New! DIY Project Planner. Plan smarter, skip the spreadsheets. Start Your Free Trial Today →

Smart DIY & Home Improvement Tips
Smart DIY & Home Improvement Tips
Fix five common light switch issues — no power, flicker, delay, loose toggle, and buzzing — with safe DIY steps and guidance on when to call an electrician.
Light switches are essential, but they can fail due to wear and tear, loose wiring, or mechanical issues. Here’s a quick rundown of common problems and how to fix them:
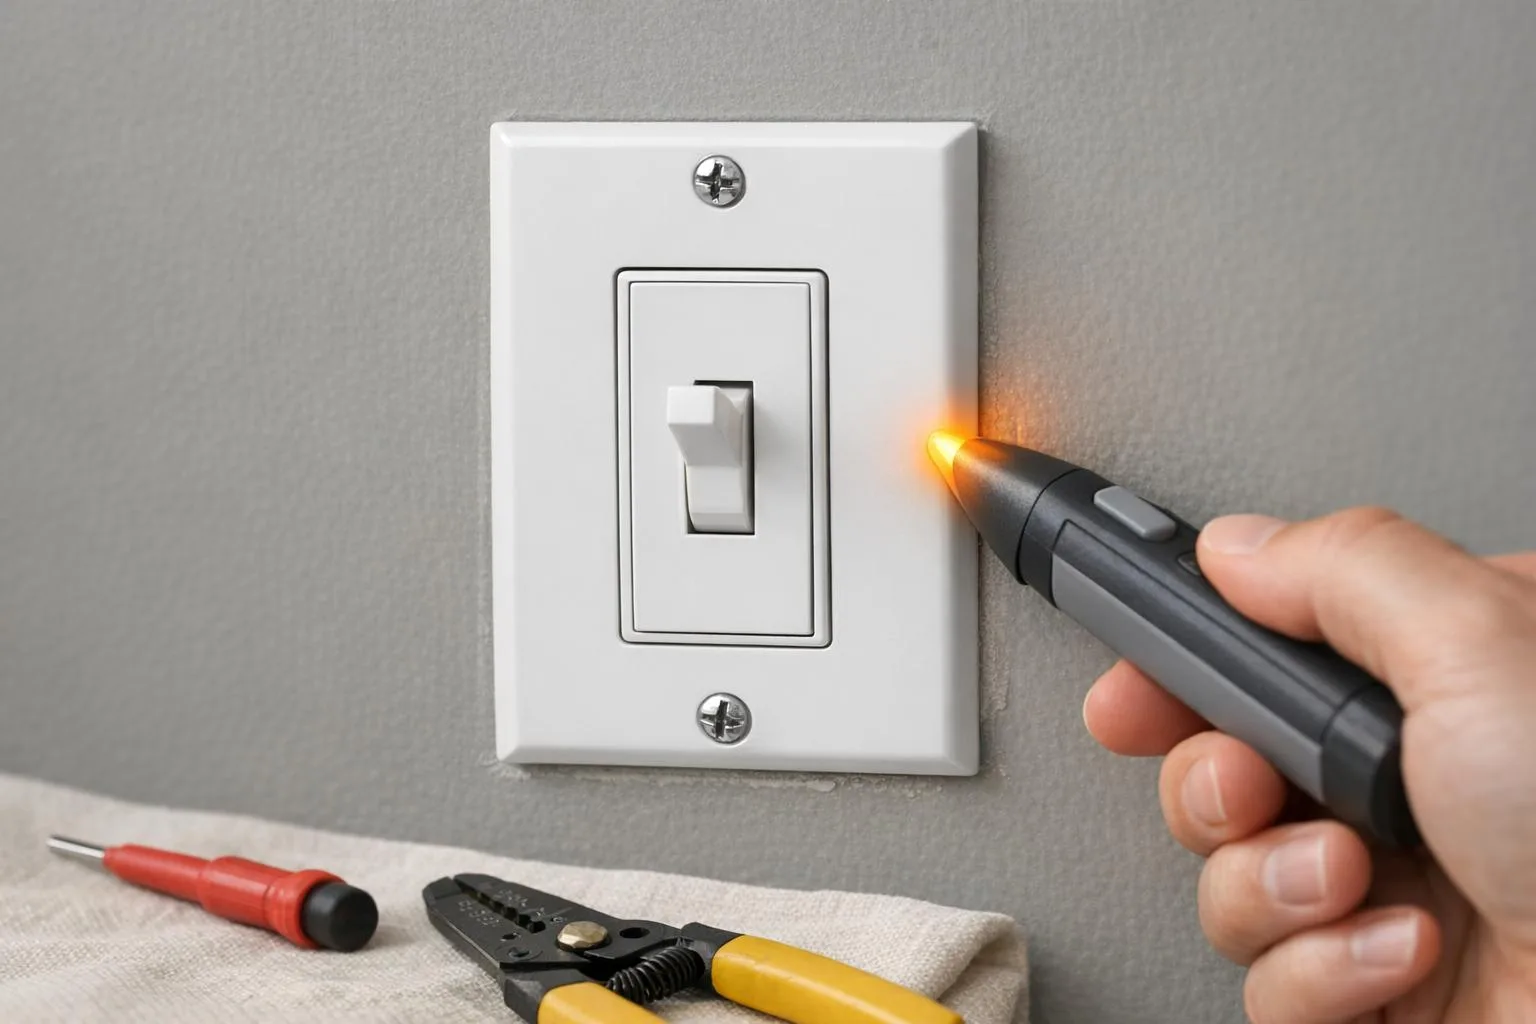
Safety Tip: Always turn off power at the breaker and use a voltage tester before troubleshooting. For severe issues like scorch marks or burning smells, call an electrician immediately.
Keep reading for step-by-step fixes and when to seek professional help.
If your light refuses to turn on, the culprit is often a burnt-out or loose bulb. Before reaching for any tools, try tightening the bulb or replacing it with one you know is functional. As Bob Formisano, a licensed architect and builder, wisely points out:
There’s no sense spending time replacing a wall switch if the problem is just a burned-out light bulb.
If the bulb isn’t the issue, check your electrical panel for a tripped breaker. You’ll usually find the handle sitting midway between "ON" and "OFF". To reset it, flip the breaker fully to "OFF" and then back to "ON." Another potential trouble spot is nearby GFCI outlets – especially in areas like bathrooms, kitchens, or garages. A tripped GFCI outlet on the same circuit can cut power to your light, even if it’s located in a different room. If these checks don’t resolve the issue, the problem might be worn-out contacts or loose wiring inside the switch.
Once you’ve ruled out simpler fixes, turn off the power at the breaker and confirm it’s off using a non-contact voltage tester. Remove the switch plate and unscrew the switch from the electrical box to examine the wiring. Look for any loose or disconnected wires, and secure them tightly. For added durability, wrap the wires clockwise around the terminal screws before tightening.
To test the switch itself, use a multimeter set to "continuity" or "ohms." With the power off and the wires disconnected, toggle the switch to "ON." A working switch will beep and show near-zero resistance. If it doesn’t, it’s time to replace the switch. Luckily, a basic single-pole switch is inexpensive, often costing less than $1. This makes it one of the cheapest home fixes, with DIY repair costs typically ranging from $0 to $15.
Flickering lights often point to loose terminal connections, commonly found in push-in (back-wired) switches. Over time, these connections can loosen, leading to inconsistent electrical contact and flickering. Licensed electrician Johnny Sharif highlights several potential causes:
It can be a loose bulb, overloaded circuit, loose wiring, fluctuations in voltage, or even an incompatible dimmer.
Another frequent issue is dimmer incompatibility with modern LED bulbs. Many older dimmer switches were designed for incandescent bulbs and lack the proper electrical setup for LEDs, leading to flickering or strobing. Additionally, not all LED bulbs are designed to be dimmable, and using a non-dimmable bulb with a dimmer switch is a common cause of this problem. Before diving into the wiring, check if the bulb has simply come loose in its socket. This can happen in recessed lighting, where vibrations from above can slightly unscrew the bulb.
You can also test the switch itself. If the flickering stops only when holding the toggle in a certain position, the switch contacts may be failing. A properly functioning switch should produce a clean, crisp snap when toggled. These observations can help pinpoint the source of the issue and guide you toward quick solutions.
To resolve flickering lights, start by securing connections and verifying dimmer compatibility. First, turn off the power and confirm it’s off using a non-contact voltage tester. Remove the switch plate and inspect the wiring. If the wires are in push-in connections, transfer them to side-terminal screws for a more secure and reliable connection. For tips on proper wire wrapping, refer back to Problem 1.
If you’re using LED bulbs with a dimmer, double-check that the bulb is labeled "dimmable" and that the dimmer itself is designed to work with LEDs. LED lighting expert Dara Greaney cautions:
Outdated dimmer switches designed for incandescent bulbs may not provide the necessary electrical compatibility for LEDs.
If your dimmer is outdated, consider replacing it with an LED-compatible model. These are typically affordable, with DIY-friendly options available for under $15.
If your light takes a few seconds to turn on after flipping the switch, or if it flickers briefly, chances are the switch’s internal components are wearing out. Timothy Thiele, an IBEW Local #176 Union Electrician, explains:
If it takes a moment for a light to turn on, or the light fixture flickers momentarily when you flip the switch, it’s a sign the metal parts inside are wearing out.
Inside the switch, spring-loaded contactors and the rocking lever can lose tension or even break over time, disrupting the electrical connection. Carbon buildup on these contactors adds resistance, generating heat that further damages the internal parts. Another telltale sign of trouble is a mushy or loose toggle, which often indicates the mechanism is failing.
There are also audible warning signs to watch out for. Sizzling, popping, or crackling sounds often mean arcing is happening due to worn or loose connections. Bob Formisano, a Licensed Architect and Builder, offers this critical advice:
A switch making audible buzzing signs or that is warm to the touch should be attended to immediately by shutting off the circuit breaker. Such a switch could pose a fire hazard and must be replaced as soon as possible.
Heat coming from the switch could point to improper electrical flow or even a minor short circuit. These issues aren’t just inconvenient – they’re dangerous. Faulty electrical components are a leading cause of house fires in the United States each year.
To ensure safety and functionality, inspect the switch and replace it if necessary.
Taking these steps not only resolves the issue but also ensures your home’s electrical system remains safe and reliable.
A loose or jammed switch often points to a worn-out mechanism or improper installation. Over time, the internal components can deteriorate, causing the issue.
The most frequent cause is a broken internal mechanism. If the toggle feels loose and doesn’t deliver that satisfying "snap" when flipped, the internal lever likely isn’t connecting properly. Timothy Thiele, an electrician with IBEW Local #176, explains:
If the switch toggle lever starts behaving differently and losing its ‘snap,’ the switch mechanism is likely worn out, or a wire connection may have come loose.
Another possible issue is loose wiring, especially in back-wired switches where wires are inserted into holes rather than secured under screw terminals. This can lead to erratic behavior.
To fix a loose or stuck switch, start by turning off the power at the circuit breaker. Use a non-contact voltage tester to ensure there’s no electricity flowing. Then, remove the cover plate and tighten the mounting screws to see if that resolves the issue.
If the problem persists, carefully remove the switch from the electrical box and inspect the toggle mechanism. If it doesn’t have a firm snap, the internal parts are likely worn out. As Bob Formisano, a Licensed Architect and Builder, notes:
If the toggle lever or slide mechanism is loose or fails to operate correctly, then the mechanical parts within the switch are worn out.
In such cases, replacing the switch is your best option. A standard single-pole switch generally costs less than $15. When installing the new switch, opt for side screw terminals instead of push-in connections for a stronger, more reliable connection. Once done, fold the wires neatly back into the box, secure the switch with mounting screws, replace the cover plate, and restore power to test the repair.
Buzzing, crackling, or popping sounds from a light switch are often signs of electrical trouble that shouldn’t be ignored. These noises can point to issues like loose wiring, electrical arcing, or an incompatible dimmer switch setup. While the problem may seem minor at first, it could escalate into a fire hazard if not addressed promptly.
Loose terminal connections are a common culprit. When wires aren’t securely fastened, electricity can arc across gaps, creating a buzzing sound and increasing the risk of fire. Sizzling or crackling noises could indicate electrical arcing, where the current jumps through a damaged circuit or air gap. If you notice these sounds – or if the switch feels warm – it’s best to shut off the circuit breaker immediately. These signs often mean the switch needs to be replaced.
For dimmer switches, buzzing is frequently caused by a mismatch between the dimmer and the bulbs it controls or an overloaded circuit. Dimmers work by rapidly interrupting the electrical current, which can cause vibrations in LED or incandescent filaments. Using non-dimmable bulbs or exceeding the dimmer’s wattage capacity can lead to buzzing. For example, if your lights behave erratically – flickering or jumping to full brightness – it’s likely a compatibility issue. While dimmer switches naturally generate some heat, standard toggle switches should remain cool; warmth in these switches could indicate a failing component.
"When it comes to dimmer switches, the adage ‘you get what you pay for’ holds true. Buzzing is more common with less expensive triac-based switches."
If tightening connections and verifying compatibility doesn’t resolve the issue, replacing the switch is the next step. Professional replacement typically costs between $60 and $300, with the national average hovering around $150.
DIY vs Professional Light Switch Repair Decision Guide
When dealing with any electrical system, safety should always come first. Using the right tools and following proper safety practices is non-negotiable. Equip yourself with essentials like a non-contact voltage tester, multimeter, screwdrivers, wire strippers, needle-nose pliers, and a flashlight. Before starting, test your voltage tester on a live outlet to ensure it’s working correctly. Never assume power is off – test every terminal in the box, even after flipping the breaker. Power can still flow if the box is part of another circuit. For added safety, wear rubber-soled shoes, work in dry conditions, and label wires with electrical tape to avoid confusion.
Some electrical fixes are simple enough for a DIY approach, like replacing a single-pole switch or tightening loose terminals. But for more serious issues, like buzzing sounds or signs of burning, it’s best to leave it to the pros. If you spot scorch marks, melted components, smoke, sparking, or if the switch feels hot to the touch, turn off the breaker immediately and call an electrician. These are signs of potential fire hazards that require expert attention.
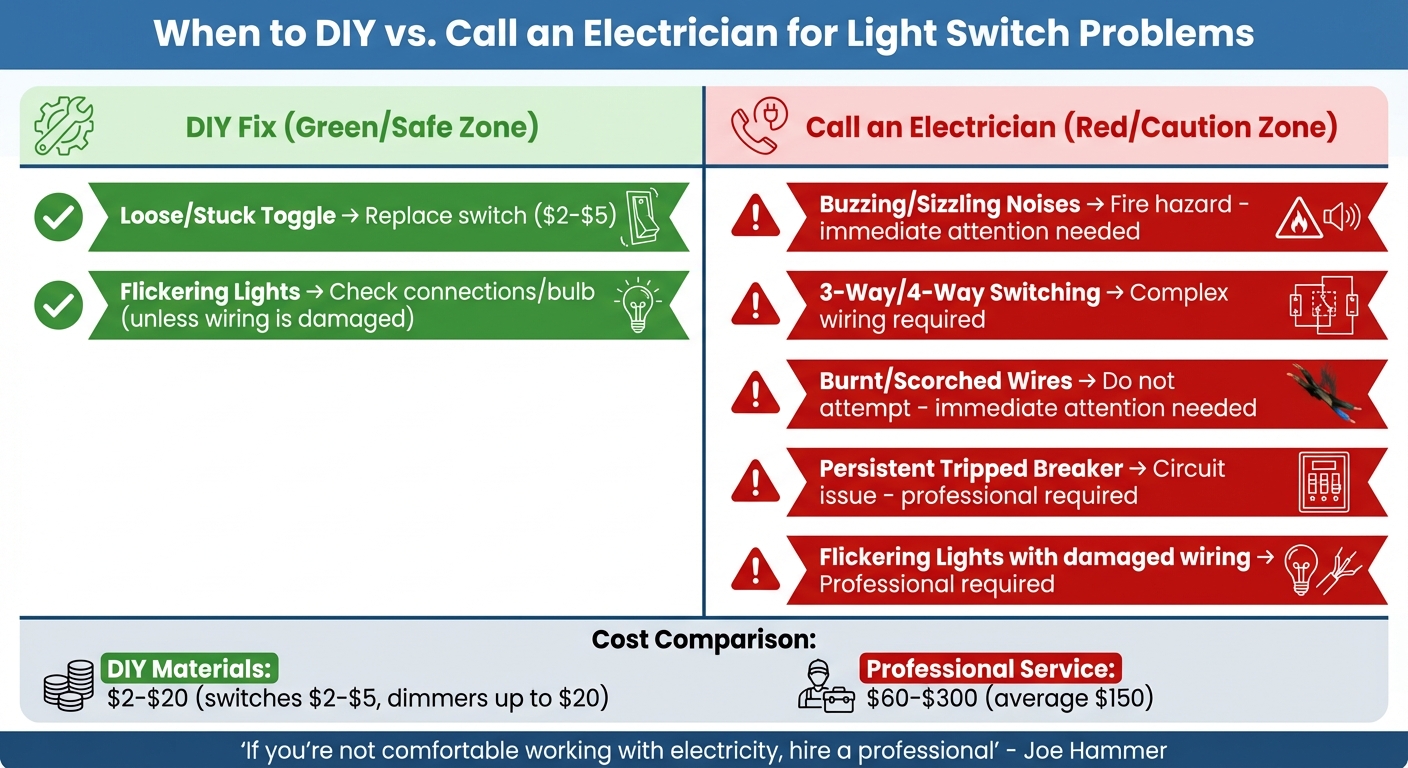
Here’s a quick guide to help you decide whether to handle the repair yourself or call a professional:
| Scenario | DIY Fix | Call an Electrician |
|---|---|---|
| Loose/Stuck Toggle | Replace switch ($2–$5) | Not needed |
| Flickering Lights | Check connections/bulb | If wiring is damaged |
| Buzzing/Sizzling Noises | Avoid DIY repair | Yes (fire hazard) |
| 3-Way/4-Way Switching | Only if experienced | Yes (complex wiring) |
| Burnt/Scorched Wires | Do not attempt | Yes (immediate attention) |
| Persistent Tripped Breaker | Do not attempt | Yes (circuit issue) |
Hiring a professional usually costs between $60 and $300, with the average hovering around $150. On the other hand, basic DIY materials are budget-friendly – standard switches cost $2 to $5, and dimmers run up to $20. But as Joe Hammer wisely points out:
The first thing any homeowner needs to know is if they are not comfortable or do not know what they are doing when it comes to working with electricity in any way, hire a professional.
No matter the cost, your safety is always the top priority. It’s better to spend a little extra than risk a dangerous situation.
Light switch problems – like bulbs that won’t light, flickering, delays, loose toggles, or buzzing – are often caused by loose wiring, worn-out components, or mismatched bulbs. The first step in troubleshooting is always to check the bulb itself before diving into more complicated issues.
It’s crucial to act quickly if you notice warning signs like scorching, smoke, burning odors, or overheated switches. In such cases, turn off the circuit immediately and contact a licensed electrician. As Volta Electric Inc. warns:
A poorly wired switch can lead to flickering lights, short circuits, or even electrical fires.
This principle of prioritizing safety should guide your decision to either handle the repair yourself or call in a professional. For simple fixes – like replacing a standard switch or tightening loose connections – you can go the DIY route if you’re confident working with electricity. But for more complex issues, such as persistent circuit breaker trips or visible damage, leaving it to the experts is the wisest choice.
Regular maintenance is key to avoiding expensive problems. Make it a habit to inspect switches monthly for cracks, discoloration, overheating, or odd sounds. Annually, tighten mounting screws, ensure dimmer switches are compatible with your bulbs, and always use a voltage tester before handling wires. These small efforts go a long way in keeping your electrical system safe and dependable.
Above all, safety comes first. If you’re ever uncertain about a repair, don’t hesitate to call a professional. Taking the right precautions ensures your lights operate smoothly and safely.
Before you dive into repairing a light switch, safety needs to be your top priority. Begin by switching off the power to the circuit at the breaker box to eliminate any risk of electric shock. Then, use a voltage tester to double-check that no electricity is running to the switch or its wires.
Equip yourself with protective gear like insulated gloves and safety glasses to shield against sparks or flying debris. Ensure your workspace is well-lit so you can see clearly, and let everyone in your home know you’re working on the electrical system to avoid any accidental interruptions. Taking these steps will help keep the repair process safe and hassle-free.
To determine if your dimmer switch works with LED bulbs, start by checking the switch itself for any markings that mention LED compatibility. While many newer dimmers are built to handle LEDs, older ones might not be suitable. Another clue lies in the switch’s load ratings – LEDs typically need dimmers with lower minimum load requirements compared to traditional incandescent bulbs.
Still unsure? Test it out with a dimmable LED bulb. If you notice flickering, buzzing, or improper dimming, the switch likely isn’t compatible. In that case, upgrading to an LED-compatible dimmer can ensure everything works smoothly.
If you’re dealing with any of these issues with your light switches, it’s time to call a professional electrician:
These problems can indicate serious electrical issues that need expert attention to keep your home safe and avoid potential hazards. Don’t wait – contact a licensed electrician to address these concerns promptly.