New! DIY Project Planner. Plan smarter, skip the spreadsheets. Start Your Free Trial Today →

Smart DIY & Home Improvement Tips
Smart DIY & Home Improvement Tips
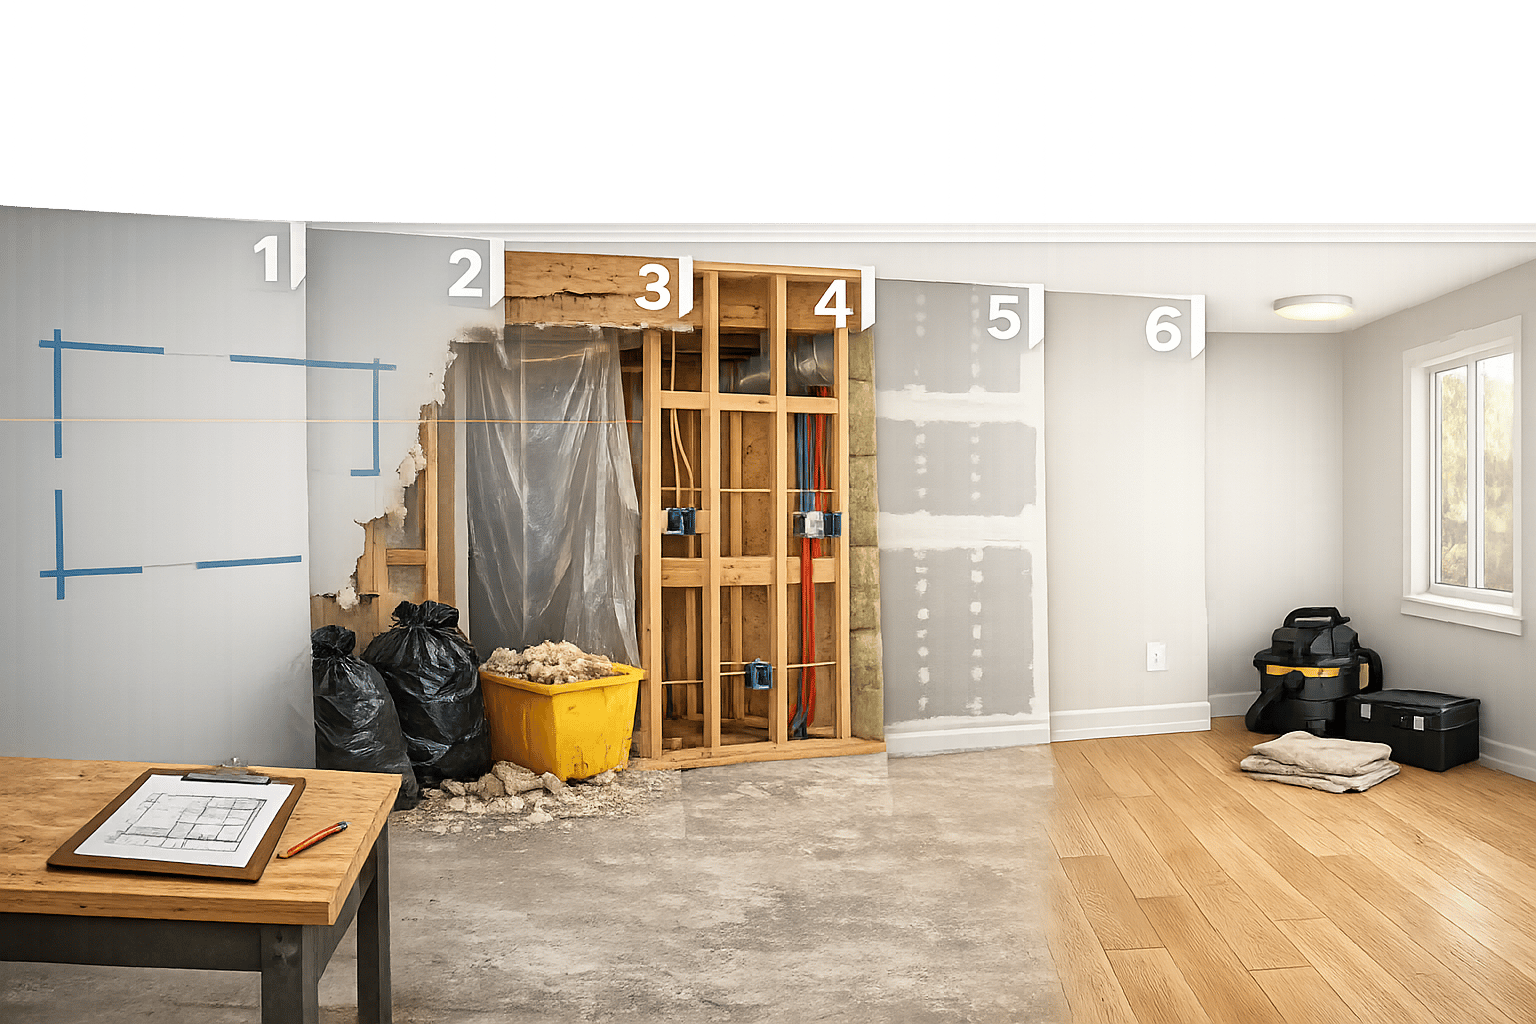
6-step renovation sequence covering planning, demolition, structural and mechanical work, insulation and drywall, finishes, flooring, and cleanup.
Renovating your home? Getting the order right is critical to saving time and money. Start with structural fixes and mechanical systems before moving to finishes and final touches. Skipping steps or working out of sequence can lead to costly rework and delays – 35% of renovations go over budget for this reason. This guide breaks down the six key phases of a renovation:
Following this sequence avoids unnecessary expenses and ensures a smoother renovation process. Let’s dive into the details.
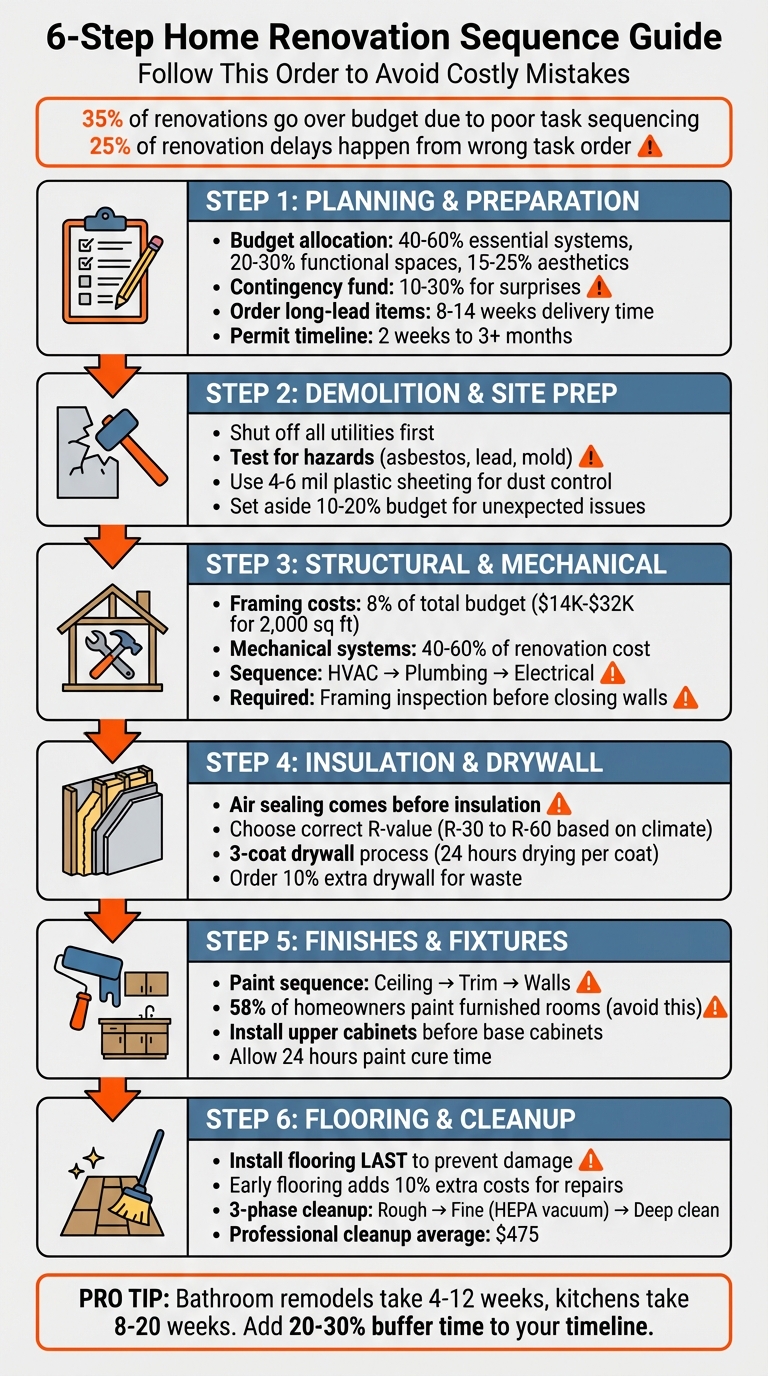
6-Step Home Renovation Sequence Guide
A solid plan is the foundation for a smooth and efficient renovation process, setting the tone for all the steps that follow.
Start by identifying your renovation priorities. Break them into three categories: Needs (essential for functionality), Wants (upgrades that improve efficiency), and Wishes (luxury features you can skip if the budget gets tight). For instance, fixing a leaky roof is a need, adding a home office is a want, and installing a skylight might fall under wishes.
Before diving into cosmetic updates, tackle critical structural issues like foundation cracks, roof leaks, or hazardous materials such as lead paint or asbestos. Also, prioritize rough-in systems – plumbing, electrical, and HVAC – so you don’t have to redo finished areas later. Kitchens and bathrooms often rank as top priorities since they disrupt daily life the most. Plus, a midrange bathroom remodel typically offers around an 80% return on investment.
Oren Farkash, CEO of South Land Remodeling, advises:
"It’s a good idea to start with your highest priority… This way, if you run out of money or energy, at least you got the most important area done".
Divide your budget strategically: allocate 40–60% for essential systems (like plumbing and electrical), 20–30% for functional spaces (such as kitchens and baths), and 15–25% for aesthetics (like paint and fixtures). Be sure to set aside an additional 10–30% as a contingency for surprises like mold or outdated wiring discovered during demolition.
Permits are a must. They ensure your work complies with local laws and prevent costly issues down the road. Permit approval timelines can vary, sometimes taking anywhere from two weeks to over three months depending on your location. Keep in mind that some permits require inspections before you can move forward with certain stages, which might slow down progress. Patrick A. Finn, President of Patrick A. Finn, highlights:
"A transparent, realistic timeline is a hallmark of a well-run project and a sign you’re working with a contractor who truly values your time, investment, and peace of mind".
When planning your timeline, work backward from your desired completion date and add 20–30% extra time to each phase for unexpected delays. For example, a bathroom remodel might take 4–12 weeks, while kitchens often require 8–20 weeks. Lock in your project scope before pricing, as even minor changes can quickly throw off your budget and schedule.
With your priorities, budget, and timeline squared away, the next big step is ensuring your materials are ready to go.
Once your budget and schedule are set, order long-lead items right away to avoid delays. Items like cabinets, windows, and specialty tiles can take 8 to 14 weeks to arrive. Place these orders as soon as you submit permits so they’re ready when needed, preventing downtime for contractors.
Michelle Gage, Founder of Michelle Gage Interiors, shares this advice:
"We find it is best to land on every single item in your renovation – the faucet, tile, countertop, cabinets, appliances, everything – all at once before placing a single order".
Finalize all your selections before ordering to avoid delays and keep the project on track. Having materials ready ensures your renovation flows seamlessly from demolition to finishing touches, avoiding unnecessary interruptions and keeping momentum strong.
With your materials ordered and permits secured, it’s time to get hands-on. Demolition is more than just tearing things down – it’s about careful planning to avoid unexpected issues later. When done thoughtfully, it sets the stage for a smoother renovation process.
Start by shutting off utilities. Turn off electricity, gas, and water at the main source to prevent fires, electrocution, or flooding. Protect areas you’re keeping by applying protective tape along hardwood floor edges, then covering them with heavy-duty tape and Ram Board. Seal HVAC vents with plastic sheeting to keep demolition dust contained.
To control dust, use 4- to 6-mil plastic sheeting and tape to create barriers. Adhesive zippers can provide a secure, sealable entrance. For windows, cover them with cardboard and use a box fan to create negative pressure, pulling dust outside.
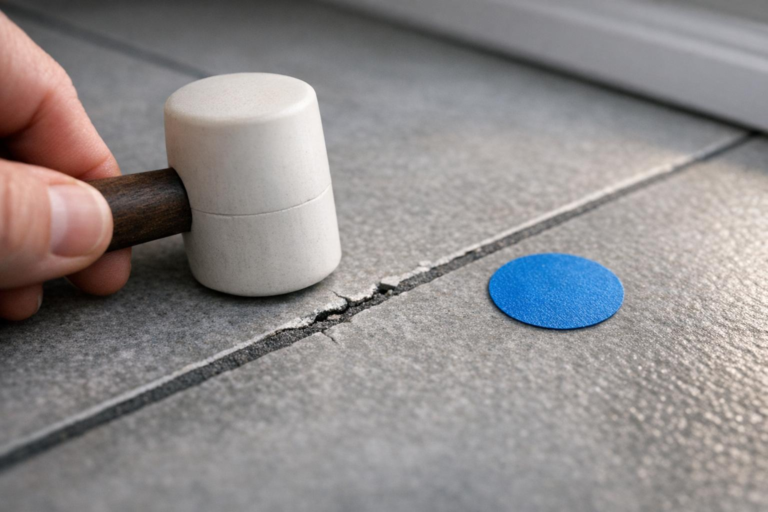
Before taking a sledgehammer to anything, make a small exploratory cut to check for hidden pipes, wires, or structural elements. As Marc Berry, Owner of Weston Builders Inc., explains:
"The biggest mistake we see in fixer-upper renovation is homeowners starting with the fun, visible improvements before addressing the boring but essential infrastructure work."
Work in reverse order when deconstructing rooms to minimize mess and avoid damaging concealed systems. Cleaning regularly throughout the process helps maintain a safe and organized workspace. Once these precautions are in place, you’ll be ready to tackle potential hazards.
Before disturbing any surfaces, test for harmful materials. Homes built before 1980 may have asbestos in pipe insulation, floor tiles, or popcorn ceilings. Similarly, houses constructed before 1978 might contain lead-based paint on windowsills, doorframes, or siding. Hire a licensed inspector to collect samples or perform X-ray fluorescence testing for lead, as home test kits can be unreliable.
Keep an eye out for structural issues like foundation cracks, uneven floors, or doors that don’t close properly. If you’re considering removing a wall, consult a structural engineer to ensure it’s not load-bearing – removing critical walls can lead to major structural problems. Mold is another concern. Look for discoloration (black, green, white, or orange) and musty odors, especially in basements or bathrooms. Small mold areas (under 10 square feet) can typically be handled by homeowners, but larger infestations require professional help.
If you discover hazards, contain the area with heavy plastic sheeting, turn off HVAC systems, and wear proper protective gear. Use wet methods like misting bottles or wet sanders to prevent dust from becoming airborne during removal. And don’t forget to set aside 10% to 20% of your project budget as a contingency for unexpected issues.
Once demolition is complete and potential hazards are dealt with, it’s time to focus on the framework of your renovation. This step sets the stage for everything else – ensuring cabinets, fixtures, and finishes fit seamlessly. Structural repairs or modifications need to happen now, before any wiring or plumbing begins.
Start by checking that your foundation is level. Any unevenness can lead to alignment problems later. Follow a logical sequence: foundation, sill plates with anchor bolts, floor joists (spaced 16 inches apart), subflooring, wall framing, sheathing, and finally, roof or ceiling rafters. A solid structure ensures that insulation, drywall, and other finishes will install smoothly and perform as expected.
Add blocking behind drywall to provide secure mounting points for cabinets, towel bars, and baseboards. To avoid squeaky floors, use wood glue between floor joists and subfloor panels. If you’re working with pressure-treated lumber, make sure to use ACQ nails to prevent corrosion.
Before closing up any walls, you’ll need a framing inspection, as required by most municipalities. Framing costs generally make up about 8% of the total building budget, with expenses for a 2,000-square-foot home ranging between $14,000 and $32,000, including labor and materials. If you’re removing walls or addressing structural issues like sagging beams, it’s wise to consult a structural engineer. Expect to pay between $350 and $800 for their expertise to ensure the work doesn’t compromise your home’s stability.
Once framing is done, move quickly to install the roof, exterior sheathing, and windows. This "dry-in" phase shields the interior from rain and moisture, preventing mold and lumber damage before mechanical systems are installed.
With the framing complete, the next step is installing the key mechanical systems.
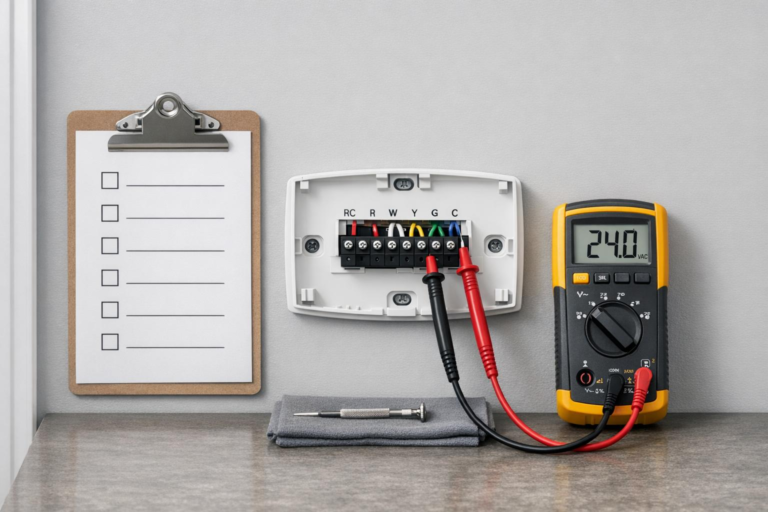
Start with HVAC installation, as its bulky ductwork takes up the most space within walls and ceilings. Next, plumbers install water supply and drain lines, ensuring proper slopes (at least 1/4 inch per foot) for effective drainage. Finally, electricians handle wiring, which is more flexible and can be routed around the existing ducts and pipes.
Before the electrician begins, review the framed space to fine-tune your lighting plan. This will help avoid conflicts between switches, outlets, and furniture placement down the line. Also, double-check that rough-in locations for toilets, sinks, and showers match the specifications of your chosen fixtures – misalignments here can lead to costly corrections later.
Don’t close walls before inspections. Photograph and inspect all rough-in systems to simplify future repairs if needed. Plumbing must undergo a full pressure and leak test before walls are sealed.
Keep in mind that mechanical systems account for a significant portion of your budget – typically 40% to 60% of the total renovation cost. Proper sequencing is essential, as about 25% of renovation delays stem from doing tasks out of order.
Once the mechanical systems are inspected and approved, it’s time to close up the walls. This stage is where exposed framing starts to look like finished interior spaces. However, sticking to the right steps is critical – shortcuts here can undermine energy efficiency and long-term performance.
Air sealing comes first. This step is crucial but often overlooked. While insulation slows heat transfer, it doesn’t block air movement. Without a proper air barrier – using materials like housewrap, caulk, or spray foam – your insulation won’t deliver the energy savings you’re aiming for. As the Insulation Institute explains:
"Adding insulation without air sealing won’t get you the benefits you are after".
Choose insulation with the correct R-value for your region. For example, northern climates may require R-60 in attics, while southern areas might need R-30. Don’t compress insulation around pipes or wires – it reduces its effectiveness. Instead, cut batts slightly larger (about ½ inch) than the cavity to ensure a snug, gap-free fit. Most batts are pre-cut to be ½ inch wider than standard 16-inch or 24-inch on-center framing for this purpose.
In attics, install eave baffles to prevent airflow from disturbing the insulation near the edges. For recessed lighting, build rigid-foam boxes sealed with tape and spray foam before adding loose-fill insulation – even "airtight" fixtures can leak and contribute to ice dams. Keep in mind, even a small 10-square-foot gap in a 1,000-square-foot attic can significantly reduce insulation efficiency.
Once insulation is properly installed, you’re ready to move on to drywall.
After insulating, the next step is hanging and finishing drywall. Start with the ceiling panels before moving to the walls. This sequence provides better support for the top edges and simplifies the process. Install wall panels horizontally, perpendicular to the studs, to minimize seams and increase structural stability. As Myron R. Ferguson, a professional drywall installer, says:
"A good hanging job provides the foundation for a quality taping job".
Use drywall screws instead of nails – they hold better and prevent nail pops. Drive screws just enough to create a slight dimple in the surface, and leave a ½-inch gap between the drywall and the floor to allow for moisture control and expansion. Order about 10% extra drywall to account for waste, and plan for roughly 1.5 five-gallon buckets of joint compound per 500 square feet.
Don’t skip the three-coat process if you want polished results. The first coat embeds the tape and fills the joint. The second coat hides the tape and smooths the surface, extending 2–3 inches beyond the tape edges. The final coat eliminates any imperfections, extending 6 inches beyond the joint center. Each coat needs about 24 hours to dry under normal conditions. Make sure the job site stays at least 55°F for drying-type compounds or 45°F for setting-type compounds.
For inside corners, use paper tape – it has a center crease that creates sharp, durable angles. For flat seams, fiberglass mesh tape works well thanks to its self-adhesive feature. Following these steps ensures your drywall is ready for finishing touches.
With the earlier stages completed, it’s time to bring your renovation to life by adding the finishing touches. This step involves painting, installing cabinets, and adding trim. The sequence in which you tackle these tasks is key to achieving a polished result. Using a project planner can help you stay organized throughout this process.
Start painting from the top down: ceilings first, followed by trim, and then walls. This method takes advantage of gravity, ensuring any drips or splatters land on surfaces that haven’t been painted yet. Painting before flooring is installed helps avoid overspray and makes cleanup easier. Allow the paint to cure for at least 24 hours before starting any sanding work. If you’re refinishing hardwood floors, paint spills on the subfloor can be sanded away during refinishing.
Professional painters work more efficiently when they don’t have to mask off floors. Plus, they can move ladders and scaffolding freely without worrying about damaging newly finished floors. Interestingly, Angi data shows that 58% of homeowners paint rooms that are already furnished, which adds extra challenges for protecting surfaces. After flooring is installed, plan for touch-ups, as heavy equipment can scuff baseboards and lower walls. Once the painting is done, you’re ready to move on to cabinetry and trim installation.
Once the paint has fully cured, you can focus on installing cabinets and trim. Start with the upper cabinets to avoid accidental damage to the base units. Use a level or laser to identify the highest point of the floor and begin installing base cabinets at that spot. This minimizes the need for shimming. For support during installation, attach a temporary 1×4 ledger board to the wall studs at your reference line.
Cabinets should be securely fastened to wall studs using structural screws, typically #10×2.5 inches or 3 inches. Be careful not to overtighten, as this could misalign cabinets against uneven walls. For precise appliance openings, use spacer sticks cut to exact dimensions (like 24 inches for a dishwasher) and attach them with pocket screws between cabinets. Don’t template stone countertops until the cabinets are in their final, level position.
Finally, install baseboards and trim after the hard flooring is laid. This ensures the trim neatly covers the expansion gap along the floor’s edge. With these steps complete, your space is ready to shine.
With cabinets and trim in place, it’s time to wrap up your renovation by focusing on flooring, final adjustments, and a thorough cleanup.
Flooring should always come toward the end of your project, after demolition, framing, mechanical work, and drywall are finished. This approach safeguards your new floors from potential damage caused by heavy equipment, sanding dust, and debris. Installing floors too early can lead to extra costs – up to 10% more – if repairs or replacements are needed.
In bathrooms, flooring should be installed after drywall is complete but before permanent fixtures are in place. This prevents older flooring from being trapped under fixtures, making future updates easier.
There’s some debate about whether flooring should go in before or after painting. Some contractors install flooring first to avoid damage from heavy equipment and ensure baseboards fit properly. Others prefer painting first to prevent spills or scratches on new floors. According to A.G. Williams Painting Company:
"Always finish your flooring before painting. This sequence not only protects your investment but also ensures a more efficient and polished renovation process".
Once floors are installed, protect them with heavy-duty coverings like Ram Board if additional work is happening overhead. For hardwood floors, avoid walking on them for at least 24 hours to let the finish cure properly.
The punch list is your last quality check, highlighting any remaining issues before the project is officially done. This list should include minor fixes or adjustments, ensuring everything meets your expectations. As Gil Gacuma from Sweeten puts it:
"Think of it [the punch list] as your final quality control check, the last crucial step before you can truly settle into your revitalized space".
Walk through each room with a critical eye, noting anything that needs attention. Mark problem areas with painter’s tape and schedule any necessary corrections, like paint touch-ups or trim adjustments, after all major work is completed to avoid further damage. Hold off on making the final payment until every item on the punch list is resolved.
Cleaning is a multi-step process. Start with a Rough Clean, which involves removing large debris and protective coverings. Follow that with a Fine Clean, focusing on dust removal using a HEPA vacuum. Finally, perform a Deep Clean, which includes disinfecting surfaces and polishing for a spotless finish. Always clean from top to bottom to capture any falling dust during the final pass.
Let dust settle before your final cleaning session. Use a Shop-Vac for heavy debris and a HEPA-rated vacuum for fine dust, as regular household vacuums can be damaged by construction particles. Replace HVAC filters, clean vents, and wipe down cabinet interiors to eliminate lingering dust. Professional post-construction cleaning averages about $475, depending on the size of your space. For your safety, wear an N95 respirator, safety goggles, and gloves during cleanup, as construction dust may contain hazardous materials like silica.
These final steps bring your project to completion, leaving your space ready for everyday life.
This guide lays out a practical path to streamline your renovation process and protect your investment.
Getting the order of tasks right transforms renovations into a smoother, more predictable experience. Tackling structural and mechanical work first is key to avoiding costly mistakes. As Bryan Baeumler, host of HGTV‘s Renovation Island, puts it:
"The right sequence is not just about looking professional – it’s about avoiding expensive redos and making sure your upgrades actually last".
The numbers back this up. About 25% of renovation delays happen because tasks are started in the wrong order. On top of that, poor sequencing causes over 35% of projects to go over budget. For example, installing flooring too early can lead to $1,000–$4,000 in extra costs, not to mention wasted time.
The six-step framework outlined in this guide – planning, demolition, structural work, drywall, finishes, and final touches – provides a reliable strategy. Start with the essentials, like sealing the building envelope, and save the high-end finishes for last, after inspections and approvals. Don’t forget to take photos of hidden systems before closing walls, and always keep a 10–20% contingency fund for unexpected challenges.
Marc Berry of Weston Builders Inc. highlights a common mistake:
"The biggest mistake we see in fixer-upper renovation is homeowners starting with the fun, visible improvements before addressing the boring but essential infrastructure work".
When tackling a project, it’s smart to start with the basics. Begin by taking care of structural, safety, and water-related issues. These are the backbone of any successful project. Once these are sorted, you can move on to planning, designing, or even ordering materials – all of which can happen simultaneously.
After the core systems – like electrical, plumbing, and HVAC – are installed, you can start layering in tasks such as insulation, drywall, and painting. These steps can often overlap to save time. The key is to follow a logical order: start with foundational work, move to systems, and finish with cosmetic details. Along the way, tackle smaller tasks that fit naturally into the timeline.
When it comes to do-it-yourself (DIY) projects, sticking to straightforward tasks is usually the safest bet. Jobs like painting, putting up wallpaper, landscaping, or handling small repairs – such as fixing a leaky faucet or swapping out a ceiling fan – are perfect examples. These typically require basic tools and come with minimal safety risks.
On the other hand, bigger, more technical jobs – like plumbing, electrical work, structural modifications, or anything that involves meeting building codes – are best left to licensed professionals. These tasks demand specialized knowledge and experience to ensure they’re done safely and correctly. Always take a moment to evaluate your skill level and the tools you have before diving into a project.
To keep your project running smoothly and avoid delays during inspections, make sure to incorporate them into your project timeline. Be prepared for each phase – whether it’s the footings, framing, or final occupancy. Double-check that all work remains visible, aligns with the approved plans, and that the site is clean and organized.
Work closely with your contractor to schedule inspections ahead of time. Address any potential issues early on to prevent work stoppages and keep your renovation moving forward without unnecessary setbacks.