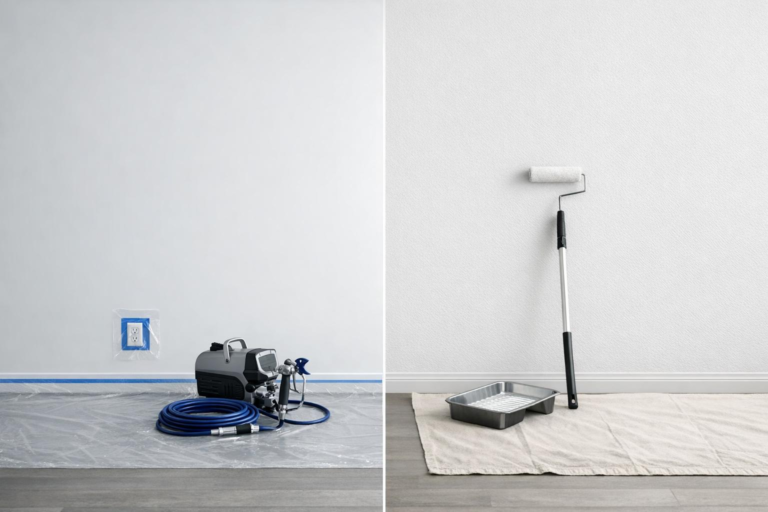
New! DIY Project Planner. Plan smarter, skip the spreadsheets. Start Your Free Trial Today →

Smart DIY & Home Improvement Tips
Smart DIY & Home Improvement Tips
You can install durable, scratch-resistant laminate flooring yourself and save thousands with this step-by-step DIY process.
Laminate flooring is a budget-friendly, durable, and stylish option for homeowners. With simple tools and a straightforward process, you can install it yourself, saving thousands in labor costs. Here’s what you need to know:
By following these steps, you’ll achieve a professional result while learning a valuable skill.

Laminate Flooring Installation Process: 4 Key Steps
Before diving into your project, it’s smart to gather all the tools and materials you’ll need. This saves you from making multiple trips and ensures a smoother installation process.
Start with a tape measure to take precise room measurements and a speed square or T-square to mark straight cutting lines. To maintain the necessary expansion gap along the walls, use 3/8-inch spacers – just remember to remove them after the installation is complete. For joining planks, a tapping block paired with a rubber mallet or hammer will protect the locking mechanism. In tight spaces or for the final row, a pull bar is essential to hook onto the plank edge and secure it.
When it comes to cutting, you’ll need a circular saw or table saw for long rip cuts and a miter saw or laminate cutter for cross-cuts. For tricky cuts around pipes or vents, a jigsaw works best. A jamb saw (also known as an undercut saw) is perfect for trimming door casings so the laminate fits neatly underneath. Don’t forget a utility knife, a level or straight edge, and leveling compound to make sure your subfloor is flat within 1/4 inch over 10 feet.
Safety is also key. Equip yourself with safety glasses, a dust mask, and work gloves. To avoid scratching your new floor, use soft-shell knee pads made of cloth or foam.
When buying laminate planks, get at least 10% extra to account for cutting errors or waste. Check if your planks come with pre-attached underlayment; if not, you’ll need to purchase underlayment (options include foam, cork, or rubber) for added cushioning and soundproofing. For installations over concrete subfloors or in basements, include a 6-mil or 4-mil plastic vapor barrier to protect against moisture.
To finish the job, you’ll need transition strips (like T-molding or reducers for doorways), quarter-round or shoe molding to cover gaps, and seam tape to secure the underlayment. In areas prone to moisture, seal the edges with 100% silicone caulk. If you’re new to this, consider an installation kit that bundles essential items like spacers, a tapping block, and a pull bar.
Having everything ready from the start will make the process much easier and more efficient.
Getting your subfloor ready is a crucial step in ensuring your laminate flooring looks great and holds up over time. Skipping this process can lead to squeaky boards, uneven gaps, or even damage. By cleaning, leveling, and protecting your subfloor, you’re setting the stage for a smooth and durable installation.
The first step is clearing the room. Remove all baseboards, moldings, and any carpet tack-boards. Once the area is clear, thoroughly sweep, vacuum, and wash the subfloor. Make sure it’s completely dry before moving forward – any debris left behind can interfere with the laminate’s floating installation.
Next, check if the subfloor is level. Use an 8-foot straightedge or a long level to measure. The standard allows for no more than 1/8 inch of variation over an 8-foot span or 3/16 inch over 10 feet. Mark any high or low spots you find. For wood subfloors, inspect for loose boards and secure them with deck screws to prevent future squeaks. If you’re working with concrete, it’s essential to perform a moisture test. Tape a 3-foot square of plastic to the floor and leave it for 24 hours – condensation under the plastic indicates a moisture issue that must be addressed before continuing.
Address any uneven areas next. Sand down high spots on wood subfloors or grind down raised areas on concrete. For low spots deeper than 1/4 inch, use a self-leveling compound to fill them. Smaller dips can be patched with a hardening floor filler. The goal is to create a flat, even surface to prevent your laminate planks from bending or forming gaps.
While you’re at it, don’t forget to undercut your door jambs. Use a jamb saw, and place a scrap piece of laminate on top of the underlayment as a height guide. This ensures the flooring can slide neatly underneath the door casing, giving you a clean, professional finish. Trying to notch planks around intricate moldings is far more challenging and often less polished.
If you’re installing laminate over concrete or in a basement, a vapor barrier is non-negotiable. Concrete is porous and can release moisture, which can cause laminate to buckle, warp, or form gaps over time. Use a 6-mil polyethylene plastic sheet, overlapping seams by 6 to 8 inches, and seal them with moisture-resistant tape. Extend the barrier about 2 inches up the wall so that it’s hidden later by the baseboards.
“Failure to install a proper vapor retarder over concrete will likely result in the floor expanding. This will cause laminate floor problems such as cupping and gaps.” – Floor Central
For wood subfloors, skip the vapor barrier. Trapping moisture against wood can lead to rot or mold. If your laminate underlayment already includes an integrated vapor barrier, a separate plastic sheet is usually unnecessary.
With your subfloor clean and level, it’s time to install the underlayment. This layer serves multiple purposes: it cushions impact, reduces noise, and supports the natural expansion and contraction of your flooring.
“Underlayment provides more stability for your flooring, minimizes the hollow sound from foot traffic, and helps increase the longevity of your floor.” – Flooring Inc.
If your flooring planks come with pre-attached underlayment, you can skip this step. Otherwise, follow these steps to properly secure and align the underlayment with your planned layout.
Start in the same corner where you’ll lay your first row of planks. Place the underlayment with the branded side facing up and the foil side down. Roll it out in a straight line, trimming the edges with a utility knife for a snug fit.
Make sure the edges meet but do not overlap – overlapping can create bumps that will show through your flooring. Use waterproof tape to seal all the seams, which keeps the underlayment in place and maintains the vapor barrier. If you’re using fiberboard underlayment, install the sheets at a 90-degree angle to the direction of your laminate planks for added structural support.
“Ensure that any underlayment rolls meet but don’t overlap. You don’t want to feel any bumps in your flooring!” – Flooring Inc.
For areas around obstacles like radiators, leave about 4 inches of clearance and immediately patch any tears with tape to maintain the barrier.
Once the underlayment is secured, align it to complement the direction of your laminate planks. Always run the underlayment perpendicular to the direction of the planks. This prevents seams from bunching up or interfering with the plank joints, which ensures a smooth and tight fit.
“Run the sheets perpendicular to the direction of the flooring – I’ve found that if you run them parallel, the seams have a way of bunching up under the flooring, catching in the joints and preventing a tight fit.” – Chris Deziel, Freelance Service Journalist
As you roll out each section, secure the edges temporarily with masking tape to keep everything in place while you work. Let the underlayment extend up the walls by about 2 inches during the initial layout. Once the planks are installed, you can trim the excess, and the baseboards will cover the edges for a clean finish.
You’re all set to start laying those planks! With a clean, level subfloor and properly aligned underlayment, you’re already off to a great start.
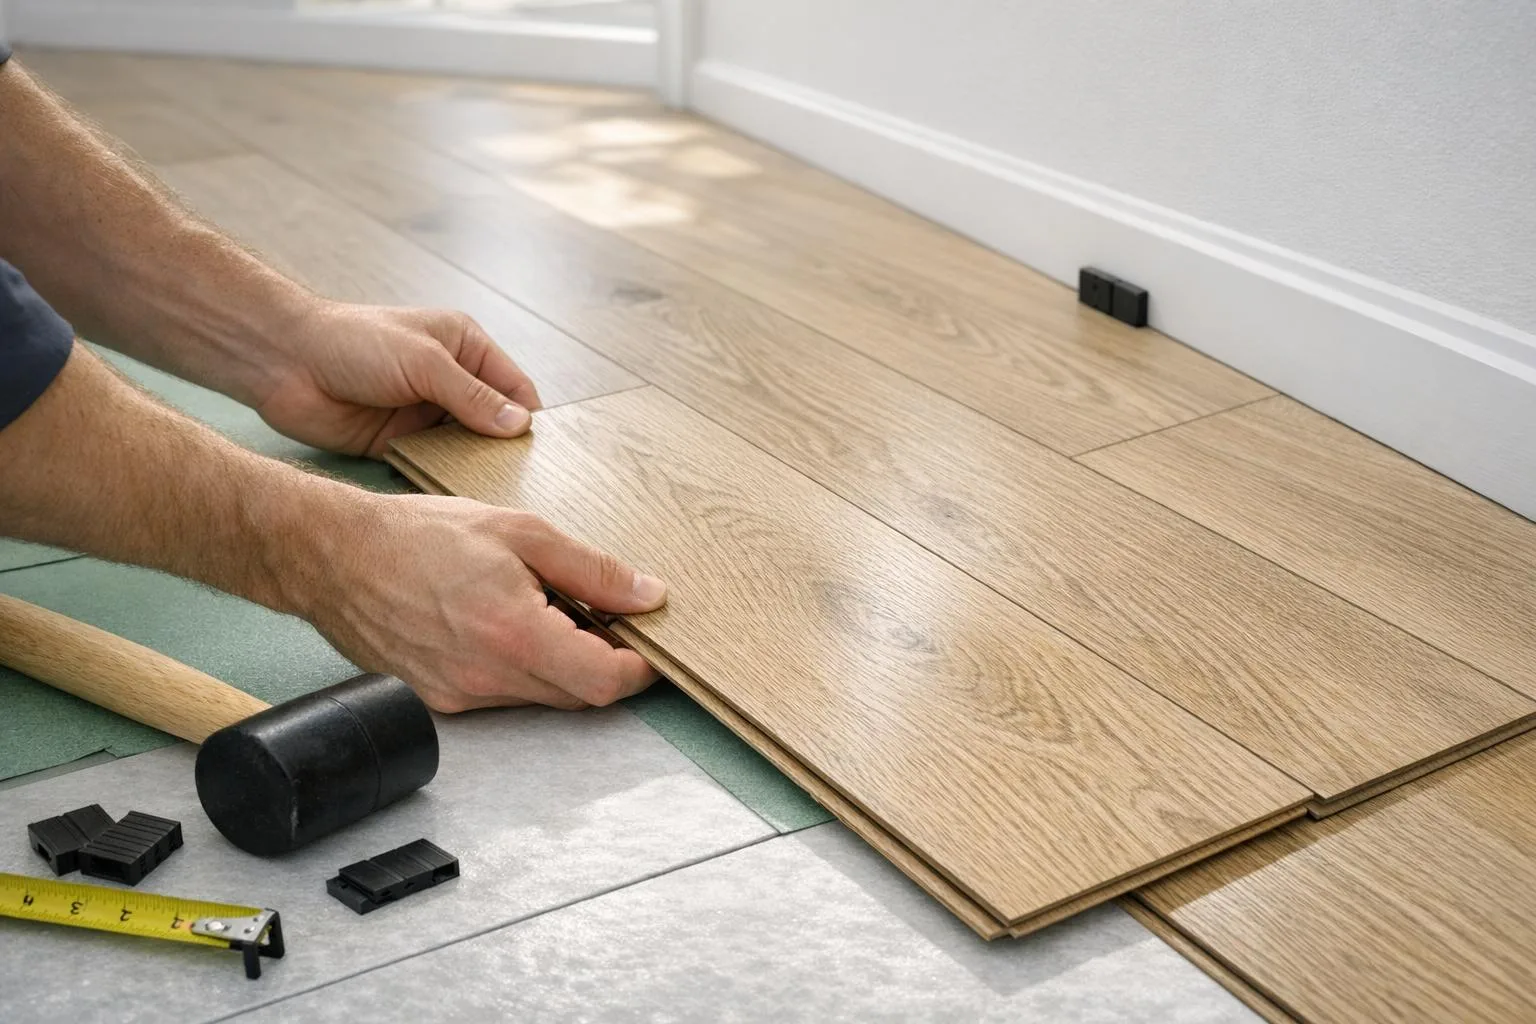
Begin in the left-hand corner of the room and work your way from left to right. Place the first plank with the tongue side facing the wall. To ensure it sits flush, remove the tongue on the side that will face the wall. Insert 3/8-inch spacers between the plank and the wall to create an expansion gap around the room’s perimeter. This gap is essential because laminate flooring needs room to expand and contract with humidity changes.
“Never hit the plank directly with a hammer. Instead, place your tapping block against the edge of the new plank and give the block a few firm but controlled taps with your rubber mallet.” – Beflooring.com
Complete the first row by locking the short ends of the planks together. Use the leftover piece from the end of the row – if it’s at least 12 inches long – to start the second row. This helps create a staggered pattern automatically. If the wall isn’t perfectly straight, trace its contour onto the planks and cut along the line for a neat, straight edge. Once the first two rows are in place, you’re ready to move on.
With the first rows done, keep the momentum going! For each new row, angle the plank between 20° and 45°, slide the tongue into the groove of the previous row, and gently rotate it downward until it clicks into place. Use your tapping block and rubber mallet to close any small gaps and ensure the seams are tight.
“When snapping the planks together, be careful not to use too much force to avoid snapping the tongue-and-groove joint.” – Michelle Barichello, Flooring Inc.
To maintain stability and a natural look, stagger the end joints by at least 12 inches (or about a third of a plank’s length). When you reach the end of a row, measure and cut the final plank to fit using a circular saw or a laminate cutter with a carbide-tipped blade. For the last plank in each row – where a tapping block won’t fit – use a pull bar and mallet to secure it snugly.
Now it’s time to wrap things up with the final row. Lay a full plank directly on top of the last installed row. Then, place another full plank on top of that and push it firmly against the wall with a 3/8-inch spacer in place. Use the edge of the top plank as a guide to draw a cutting line on the plank beneath it, ensuring the expansion gap is preserved.
Cut the planks lengthwise using a table saw or jigsaw. Since there’s limited space to angle the last plank into place, use a pull bar to hook over its edge and tap it gently with a mallet to lock it in. For obstacles like pipes, drill a hole ½-inch larger than the pipe’s diameter, then cut through the plank at the center of the hole to fit around the obstruction.
Wrap up your project with a few final steps to give it a clean, professional finish.
Start by removing all wall spacers to allow for proper expansion. Then, cover the 1/4- to 3/8-inch expansion gap with baseboards or moldings.
When attaching baseboards and moldings, make sure to nail them into the wall or existing baseboard – not into the laminate flooring itself. Nailing into the floor can restrict the natural movement of the floating planks, which could lead to buckling or gaps as the floor expands and contracts.
“The nails should go into the walls, never the floor. Any plank that you attach to the subfloor won’t be able to move with the rest of the floor, and the result may be buckling or gapping.” – Chris Deziel, Field Expert, Family Handyman
For shoe molding or quarter-round, predrill 1/16-inch holes and secure them with 4d finish nails. Set the nails slightly below the surface, fill the holes, and apply caulk along the top edge for a seamless look. In areas prone to moisture, like kitchens or bathrooms, you might want to use 100% mildew-resistant silicone sealant in the expansion gaps before installing the moldings. This will help prevent water from seeping in.
Once the moldings are in place, it’s time to tackle floor transitions for a truly polished appearance.
Transition strips are a must for doorways, sliding doors, or anywhere your laminate flooring meets a different type of flooring – like carpet or tile. The type of transition strip you choose depends on the situation: T-molding works for hard surfaces of similar height, reducers are ideal for stepping down to a lower surface, and square nose or end molding is best where laminate meets carpet or ends at a fireplace.
To install T-molding, apply construction adhesive in the gap between the two flooring surfaces and press the molding into place. Use painter’s tape to hold it steady while the adhesive sets. Keep in mind, transition strips should never be fastened directly to the laminate planks. Instead, secure them to the subfloor using construction adhesive or the track and screws provided by the manufacturer.
“Never under any circumstances use a t-molding where laminate meets carpet. The reason is simple, the t-molding will break! It needs the support of a hard surface on both sides.” – Joe Letendre, Professional Installer
Even with careful planning, a few common mistakes can derail your laminate flooring project. To ensure your hard work pays off and your floor lasts for years, it’s crucial to steer clear of these pitfalls. Here’s what to watch out for during your installation process.
Did you know laminate flooring needs room to move? Because laminate is a floating floor system, the planks naturally expand and contract with changes in humidity and temperature. Without a proper gap around the edges, the floor can buckle or warp under pressure.
“I’ve seen hardwood floors buckle and even ‘explode’ under the pressure of wood movement because the expansion gaps weren’t left in place.” – Ben Kuhl, CEO, Shelf Expression
To avoid this, maintain a 1/4‑inch to 3/8‑inch gap around the room’s perimeter and any fixed objects like door jambs, pipes, or cabinets. Use plastic spacers to keep the gap consistent as you install. For pipes, drill holes that are 1/2‑inch larger than the pipe diameter to provide enough clearance.
A level subfloor is the foundation of a successful laminate floor installation. An uneven subfloor can cause squeaks, hollow sounds, and damage to the planks’ locking mechanisms. To avoid these issues, ensure the subfloor is flat within 1/8‑inch over an 8‑foot span or 1/4‑inch across a 10‑foot span.
Use an 8‑foot straightedge to check for high spots or low areas. Sand or grind down high spots and fill depressions with appropriate materials. For shallow dips (less than 1/4‑inch), layers of building paper can work, while deeper spots require a Portland cement–based filler. Remember, underlayment provides cushioning but won’t fix an uneven subfloor.
The way you align the planks’ seams plays a big role in the floor’s stability. If the end joints in adjacent rows are too close together, the floor can develop weak spots and noticeable patterns. To prevent this, stagger the seams by 6 to 12 inches between rows. Start each new row with a leftover piece that’s at least 8–12 inches long to create the necessary offset while reducing waste. Avoid creating “H” patterns, which can weaken the floor and make installation flaws more obvious.
| Common Mistake | Consequence | Prevention Method |
|---|---|---|
| Overlapping Underlayment | Bumps and uneven flooring | Butt edges together and seal with manufacturer‑recommended tape |
| Improper Staggering | Structural weakness and “H” patterns | Use cut ends (8–12 inches) to start new rows |
| Rushing Installation | Gaps or buckling weeks later | Allow 48+ hours for acclimation and 24 hours for setting after installation |
| Ignoring Subfloor Debris | Debris causing uneven planks and noise | Thoroughly sweep and vacuum subfloor before laying underlayment |
By carefully following each step, you’re ready to wrap up your laminate flooring project. Tackling this as a DIY effort can save you thousands in labor costs. Don’t forget the essentials: proper acclimation of the flooring and leaving expansion gaps to allow for natural movement.
“Laminate flooring installation is totally a DIY project! You don’t have to worry about glue, grout, adhesives or anything that creates an extra mess.” – Michelle Barichello, Author, Flooring Inc
A smooth, level subfloor, a secure underlayment, and well-staggered seams are the backbone of a long-lasting floor. Take your time with each plank – listen for that satisfying click, double-check for expansion gaps, and finish by attaching your baseboards. Every detail you’ve carefully managed contributes to a polished, professional-looking result.
Completing this project not only helps you cut costs but also equips you with new skills and the confidence to take on future home improvement tasks. With the right tools, a bit of patience, and close attention to detail, you’ve created a space that’s both functional and beautiful – all on your own terms and timeline. Now, it’s time to enjoy your transformed living space!
Avoiding mistakes during laminate flooring installation can make a huge difference in both the look and longevity of your floors. Start with the subfloor – it needs to be clean, dry, level, and free of any debris. If the subfloor isn’t even, you might end up with creaks or buckling later. Next, don’t rush into laying the planks. Let them sit in the room for 48–72 hours to adjust to the temperature and humidity. Skipping this step can lead to gaps or warping once the floor is installed. Also, don’t forget the essentials: use the right underlayment and leave expansion gaps along walls and around fixed objects to avoid buckling.
Some other common errors? Using the wrong tools, failing to plan the plank layout, or ignoring the manufacturer’s instructions. For example, skipping moisture barriers or not spacing planks correctly can lead to early wear and tear. Taking the time to prepare and follow these steps will help you achieve a polished, durable floor that looks like it was done by a pro.
To get a concrete subfloor ready for laminate flooring, start by removing any old flooring, padding, or debris. Make sure to clean the surface thoroughly by sweeping or vacuuming. Next, check for moisture by taping a 2-foot by 2-foot plastic sheet to the floor for 24 hours. If you see condensation under the plastic, there’s a moisture problem. For a more accurate reading, use a moisture meter – moisture levels should be under 5 pounds per 1,000 square feet within 24 hours.
Make sure the concrete is fully cured (this takes at least 90 days for new slabs) and stable. Check if the surface is level – uneven spots shouldn’t exceed 3/16 inch across a 10-foot span. Grind down any high areas and use a cement-based leveling compound to fill in low spots. Once the floor is level and completely dry, lay down a 0.006-inch polyethylene vapor barrier. Overlap the seams by at least 6 inches and seal them with waterproof tape. If the laminate manufacturer recommends underlayment, install it next. Finally, double-check that the floor is clean, dry, and ready for the laminate installation.
To get your laminate flooring project off to a smooth start, you’ll need some key tools. Begin with a measuring tape to plan your layout and ensure precise cuts. A saw – whether it’s a circular, miter, or jigsaw – will help you trim planks to fit your space perfectly. A rubber mallet is essential for locking the planks together securely without causing any damage. Don’t forget spacers, which are crucial for maintaining the proper expansion gap between the flooring and the walls, and knee pads to keep your knees comfortable during the installation process.
You might also find a pull bar handy for working in tight spots, a speed square for clean and accurate cuts, and marking tools like a pencil to ensure your measurements are spot on. Safety gear is equally important – wear gloves and safety glasses to protect yourself while working. With these tools by your side, your laminate flooring project will be much easier, safer, and more efficient to tackle.