New! DIY Project Planner. Plan smarter, skip the spreadsheets. Start Your Free Trial Today →

Smart DIY & Home Improvement Tips
Smart DIY & Home Improvement Tips
Step-by-step checklist to test, clean, and calibrate your thermostat, check wiring and power, swap batteries, and know when to call an HVAC pro.
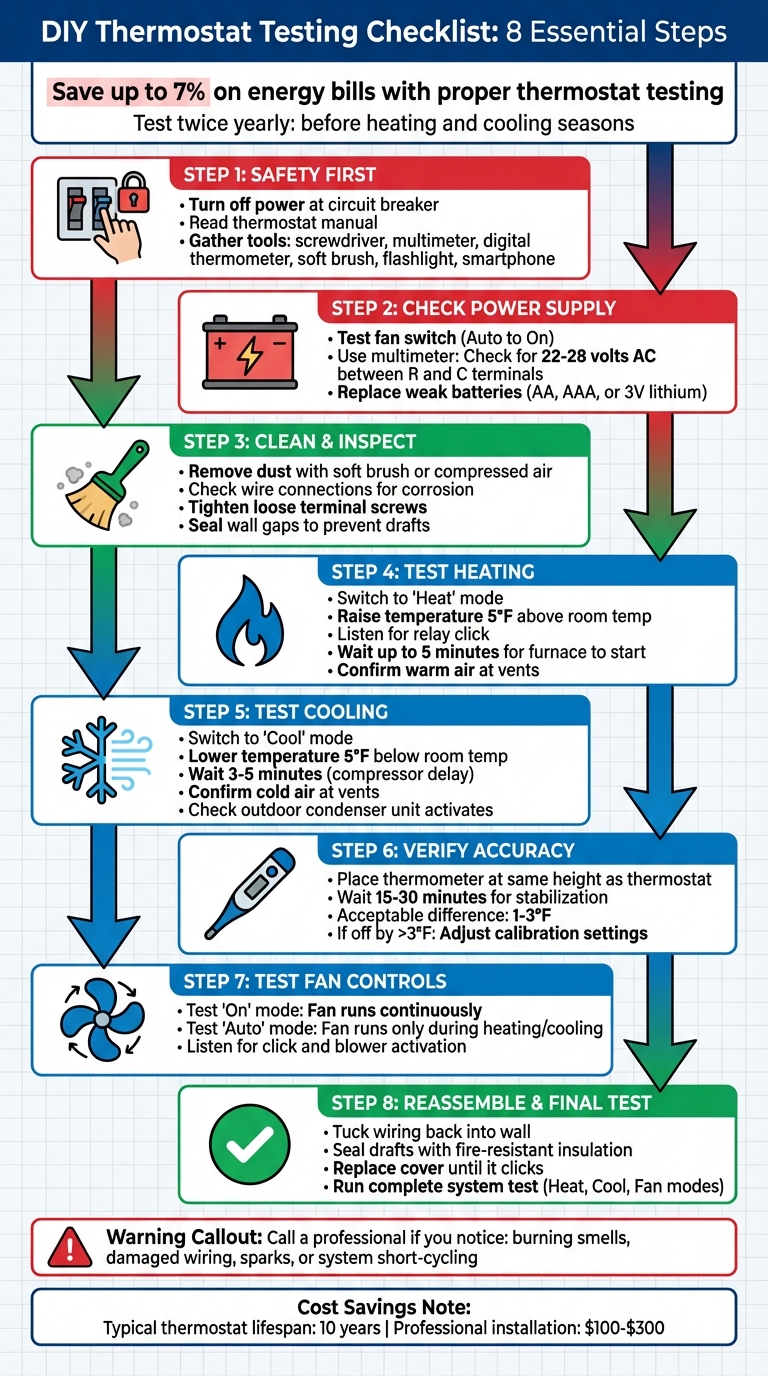
A thermostat that’s even a few degrees off can cost you up to 7% more on energy bills. Regular testing ensures accurate temperature control, saves money, and keeps your home comfortable. Here’s a quick overview of what you’ll learn:
Testing your thermostat twice a year – before heating and cooling seasons – can prevent costly repairs and ensure your HVAC system runs smoothly. Let’s dive into the details.
DIY Thermostat Testing Step-by-Step Guide
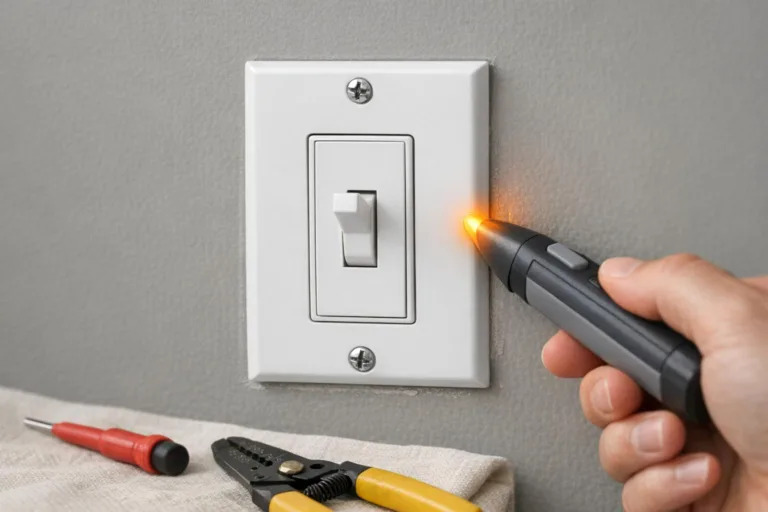
Before handling any wires or opening your thermostat, it’s crucial to take safety precautions. While residential thermostats typically operate on 24 volts, mishandling them can result in mild shocks or even damage to your equipment.
Find the circuit breaker dedicated to your HVAC system in your main service panel and switch it to the "off" position. If your system can be unplugged, do that as well. This step ensures wires won’t accidentally touch and cause a blown fuse in the control board.
As Chris Deziel points out:
"A standard heating/cooling thermostat operates at low voltage (24 volts), so if you get a shock, it won’t be a bad one. Nevertheless, no shock is better than a mild one, so play it safe and turn off the power whenever you’re handling the wires."
After turning off the breaker, double-check that the power is off. Look for a blank thermostat display or try activating your system – it shouldn’t respond. Once you’re sure the power is off, review your thermostat manual to prevent wiring mistakes.
Your thermostat manual is your go-to guide for avoiding costly errors. It includes details like wiring diagrams and instructions for diagnostic modes. The manual will also explain how to safely remove the thermostat body without damaging its plastic clips and whether your system requires a "C-wire" for constant power. Before disconnecting wires, compare your setup to the wiring diagram to spot any previous installation errors. Once you’ve reviewed the manual, you’re ready to gather the tools you’ll need.
Having the right tools on hand makes the job smoother. Here’s what you’ll need:
With these tools ready, you’re set to move forward confidently and safely.
Make sure your thermostat is getting power. Just because the display is lit doesn’t mean the system is functioning properly – many thermostats run their screens on batteries while relying on a separate power source to communicate with the HVAC system.
To check the power, switch the fan setting from "Auto" to "On." If the blower turns on, the system is receiving power. If nothing happens, the issue could be further up the line.
Double-check that all furnace or air handler panels are securely closed and inspect the dedicated HVAC circuit breaker to ensure it hasn’t tripped.
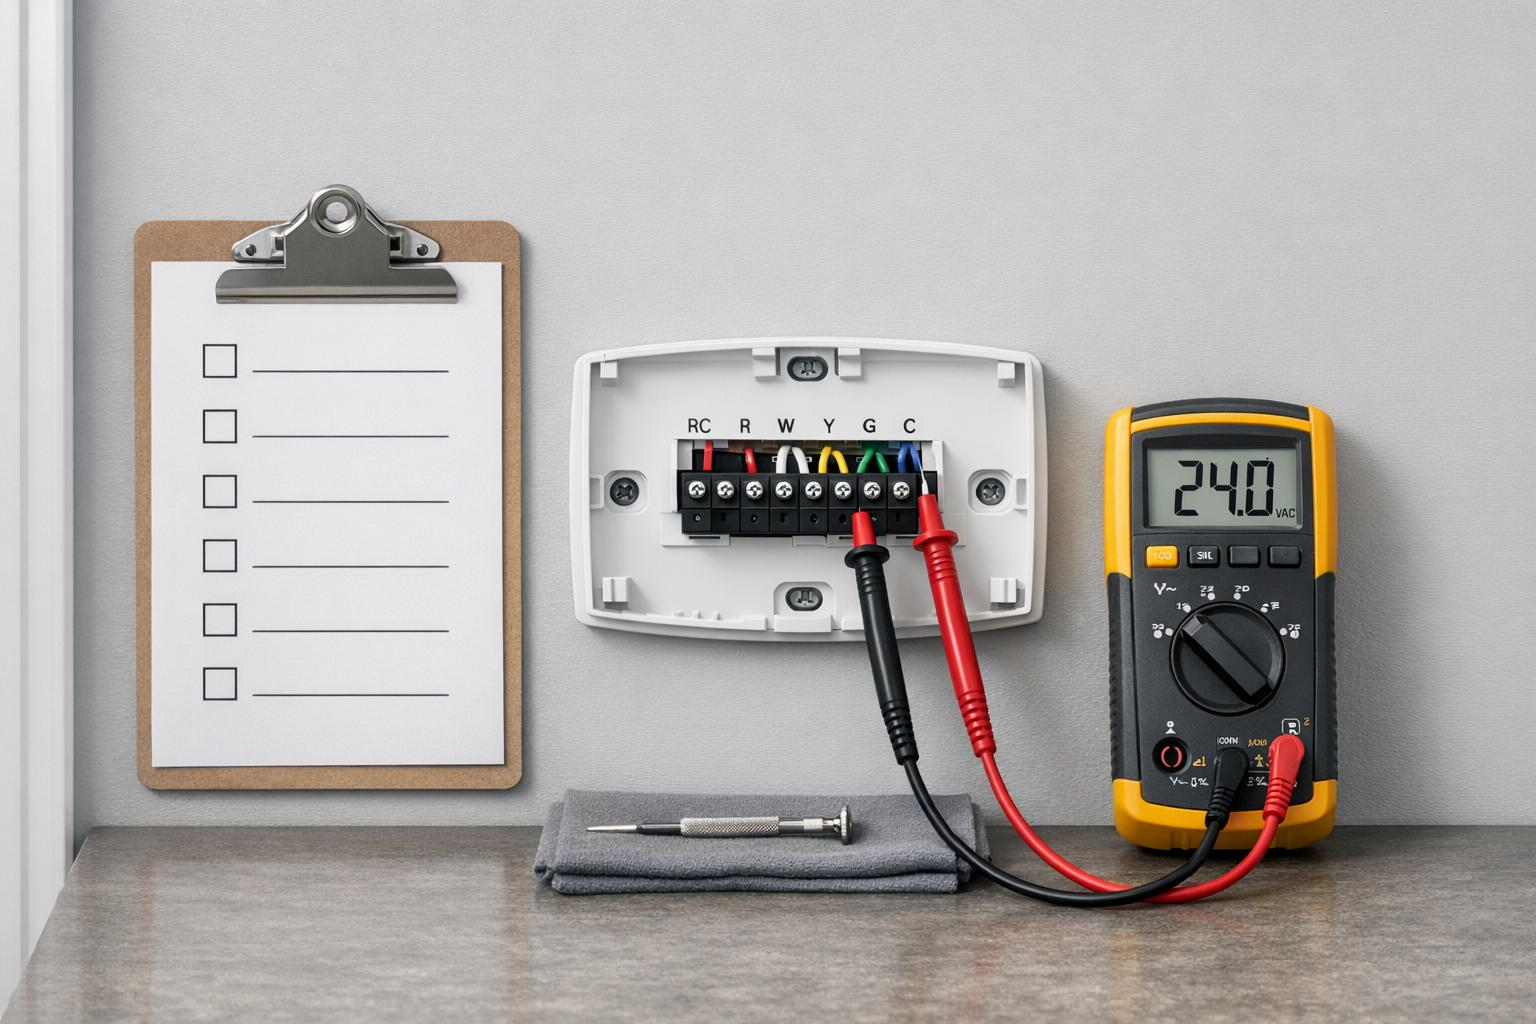
For a more precise check, use a multimeter set to AC voltage. Measure the voltage between the R (red) and C (blue/black) terminals. A proper reading should fall between 22–28 volts AC. If you get a zero-volt reading, the problem might be a blown fuse on the HVAC control board or a faulty transformer, rather than the thermostat itself.
If power is confirmed but the thermostat still isn’t working, it’s time to look at the batteries.
Weak batteries can lead to strange behavior or even system shutdowns. Most thermostats use standard AA or AAA alkaline batteries, though some newer models require 3V lithium button cells, and older ones might use 9-volt batteries.
To replace the batteries, remove the thermostat body from its wall plate. If there’s a latch or screw holding the battery compartment in place, use a small screwdriver to open it. Pay attention to the battery polarity when inserting new ones. Once the batteries are replaced, check that the display works and update the time or date if needed.
If the display stays blank after replacing the batteries, the issue might involve a tripped circuit breaker or a loose wire connection. Checking the batteries is a key step in confirming the power supply before diving into more complex troubleshooting.
Dust buildup and loose wiring are often behind thermostat inaccuracies. A dirty thermostat can throw off its calibration, potentially raising your heating and cooling costs by up to 7%. Regularly inspecting and cleaning your thermostat ensures it stays accurate, keeps your system running smoothly, and helps you avoid unnecessary energy expenses.
Start by carefully removing the thermostat cover. Most covers either snap off with gentle pressure or slide upward from the mounting plate. Some models may have clips or screws, so check for these before attempting to remove the cover.
Once the cover is off, use a soft-bristled paintbrush or a can of compressed air to remove dust from the internal components. Focus on any visible sensors or coils, but avoid using a vacuum cleaner – its suction power can damage delicate parts. For older electromechanical thermostats, clean the contact points by sliding a piece of flat, clean paper between them. This method removes debris without scratching the protective coating.
After cleaning, inspect the wire connections to ensure they’re secure and free of corrosion.
With the cover removed, examine the wires for any signs of damage, like corrosion, fraying, or looseness. Gently tug on each wire; if one moves, use a small screwdriver to tighten its terminal screw. Over time, normal vibrations in your home can loosen these connections. If you notice dull or crusty wire ends, clean them with a cotton swab dipped in isopropyl alcohol or carefully scrape them with a utility knife to expose fresh copper.
"Tighten loose connections with a screwdriver, and use a cotton swab to clean away corrosion." – Walter Curtis
Also, check the wall opening where the wires enter the thermostat. If the gap around the wires is too large, cold air can seep in and affect the thermostat’s sensors, leading to inaccurate temperature readings. Seal any gaps with tape or caulk to prevent drafts from interfering with its performance.
Once you’ve cleaned and inspected your thermostat, it’s time to make sure it properly controls your heating equipment. This step ensures the thermostat and furnace are communicating correctly. Begin by testing the heating function by switching the thermostat to "Heat" mode.
Set your thermostat to "Heat" mode and raise the temperature setting by at least 5°F above the current room temperature. This difference is needed to activate the heating system. If the thermostat is following a programmed schedule or vacation mode, those settings might override your manual adjustment, so double-check for any active programs.
After switching to "Heat" mode and increasing the temperature, listen for a clicking sound – this indicates the internal relay has engaged. Once you hear the click, give the furnace up to 5 minutes to respond.
Once the relay clicks, check if the furnace reacts. For most systems, the blower motor should start running, and in gas or oil furnaces, the burner should ignite shortly after. Go to the air vents in your home and place your hand near them – you should feel warm air flowing within a few minutes.
"If the heating or cooling system activates at the set temperature and maintains it steadily, the thermostat is likely working." – HomeTips
If the system doesn’t respond, start by checking the circuit breaker to see if it has tripped and ensure the power switch on the furnace is turned on. To dig deeper, you can use a multimeter to test the voltage. A properly functioning thermostat should show about 24 volts when tested between the R (red/power) and C (common) terminals. If your furnace starts but then quickly turns off and on repeatedly, this short-cycling could point to a calibration problem or a faulty sensor.
This test is a key step in confirming that your thermostat and furnace are working together efficiently.
This step ensures that your cooling system responds correctly and that your thermostat effectively communicates with the air conditioning equipment. After verifying the heating system functions properly, it’s time to test the cooling setup.
Set your thermostat to "Cool" and lower the temperature setting by at least 5°F below the current room temperature. Make sure there are no active schedules or holds that might override your adjustment. Listen for signs that the cooling system is starting up, keeping in mind that many systems include a 3–5 minute compressor delay. Once the delay passes, confirm the cooling system activates as expected.
After the thermostat sends a cooling signal, the outdoor condenser unit should power on, and the indoor blower fan should begin circulating air. Check the supply vents to ensure cold air is flowing within a few minutes.
"If the heating or cooling system activates at the set temperature and maintains it steadily, the thermostat is likely working." – Don Vandervort, HomeTips
To double-check, use an independent thermometer near the vents to confirm a temperature drop after the system has been running for a few minutes. If the air conditioner does not start, inspect the circuit breaker for any issues. For more advanced troubleshooting, turn off the power and briefly connect the R (red) and Y (yellow) terminals. If the air conditioner starts with this bypass, it’s a strong indicator that the thermostat may need replacement.
Once you’ve confirmed your HVAC system is functioning properly, the next step is to ensure your thermostat accurately displays the room’s temperature. If the thermostat’s reading is off, even by a small margin, it can lead to your system running longer than necessary. This could increase your energy bills by 5–10% for every degree the thermostat is off.
After verifying basic functionality, it’s time to check the accuracy of your thermostat’s temperature reading. To do this, you’ll need a reliable thermometer – this could be a standard glass tube thermometer, a digital room thermometer, or even a verified meat thermometer. Before comparing, make sure your thermometer is accurate. A simple way to check is by placing it in boiling water; it should read exactly 212°F.
Position the thermometer at the same height as your thermostat, keeping it a few feet away from the wall. To minimize wall influence, you can use a small barrier like a folded paper towel. Allow the thermometer to stabilize for 15–30 minutes before taking a reading. Make sure it’s placed away from direct sunlight, lamps, drafts, or HVAC vents, as these can affect the reading. A difference of 1°F to 3°F between the thermostat and thermometer is generally acceptable. If the discrepancy is greater than 3°F, you’ll need to adjust the thermostat’s calibration settings.
If your thermostat’s reading is off by more than 3°F, you’ll need to recalibrate it. For digital thermostats, locate the "Temperature Offset" or "Calibration" option, often found under "Advanced Settings", "Installer Setup", or "Preferences." Adjust the offset by entering a positive or negative value. For instance, if your thermostat reads 72°F but the actual room temperature is 75°F, set an offset of +3°F.
For older mechanical thermostats, the process is a bit different. Remove the cover to access the calibration mechanism, which is typically a small screw or dial near the bimetallic coil. Turn it in small increments until the thermostat’s reading matches the actual room temperature. Also, ensure the thermostat is level using a bubble tool – mechanical models with mercury vials can give inaccurate readings if tilted. Additionally, clean the bimetallic strip or sensor with a soft brush, as dust buildup can interfere with accurate readings.
Once you’ve confirmed temperature accuracy, it’s time to test the fan controls. A thermostat’s ability to manage the fan is crucial for efficient HVAC performance. The fan setting determines whether the blower motor runs continuously or only when heating or cooling is active. Most thermostats feature two primary modes: "On", which keeps the fan running 24/7, and "Auto", which operates the fan only when the system is heating or cooling. Some newer models also include a "Circulate" mode, which runs the fan for about 20 minutes per hour to maintain airflow during mild weather.
To ensure the fan modes function properly, test each one individually. Start by switching the fan to "On" and check a nearby vent. The blower should activate within seconds and continue running, even if the furnace or air conditioner isn’t currently heating or cooling.
Next, switch the fan to "Auto" and adjust the temperature to trigger either heating or cooling. In this mode, the fan should only run while the system is actively working. If you’re testing heating, note that the fan won’t start immediately – it waits for the furnace plenum to warm up to prevent blowing cold air into your home.
For a more thorough test, enlist a helper. Have one person change the fan mode at the thermostat while the other listens near the unit or a vent. You should hear a click from the thermostat followed by the blower starting. Be patient, as some systems include a built-in delay of up to 5 minutes to protect the equipment.
If the fan runs non-stop in "Auto" mode, it could indicate a faulty fan limit switch or a short in the green (G) wire. On the other hand, if the fan doesn’t respond at all when set to "On," inspect the G wire connections at both the thermostat and the furnace control board. Loose or corroded connections are often to blame.
After completing all your tests, carefully tuck any extra wiring back into the wall opening. This ensures the thermostat sits flush with its baseplate and avoids pinched connections that could lead to unreliable performance.
If the wall cavity behind the thermostat allows drafts, seal the hole with a fire-resistant material like fiberglass insulation. This prevents airflow from interfering with the thermostat’s temperature sensor.
To reattach the cover, align the tabs on the cover with the slots on the base. Press firmly until you hear a click. HVAC technician André R. advises:
"Ensure that the pins are properly aligned, if applicable, and then push it in. You should hear a click, and that’s all there is to it".
For models that use mounting screws, tighten them securely but avoid overtightening, as this could damage the plastic housing. If the cover doesn’t attach properly, check for broken clips or debris that might be blocking the fit.
Once the cover is securely in place, you’re ready to move on to a full system test.
Turn the power back on at the circuit breaker and go through all the thermostat modes one last time. The cleaning and wiring checks you performed earlier should ensure accurate results.
Start by setting the thermostat to "Heat" and increasing the temperature at least 5°F above the room’s current temperature. Listen for the thermostat to click, and confirm that the furnace ignites and warm air flows through the vents. Next, switch to "Cool" mode and lower the temperature by 5°F. The outdoor condenser unit should activate within a few minutes. Lastly, test the "On" and "Auto" fan modes to make sure the blower responds as expected.
Be aware that some systems include a built-in delay of 3–5 minutes when switching between modes to protect the compressor. If the system doesn’t start, the thermostat doesn’t click, or the displayed temperature doesn’t match an external thermometer, you might be dealing with a wiring or calibration issue that requires further attention.
If any issues remain after this thorough test, the next section will guide you on when it’s time to call an HVAC professional.
If your DIY efforts haven’t solved the problem, it might be time to bring in a professional. But before you make that call, here are a few troubleshooting tips to try.
Thermostat issues are often straightforward to address. A common culprit? Batteries. Replacing them can resolve many issues. Also, check for loose terminal screws or dust buildup inside the thermostat. Cleaning the interior with a soft brush or compressed air every six months can help prevent temperature sensor interference.
Another frequent issue is incorrect settings. Make sure the thermostat is set to the proper mode – Heat or Cool – and that the temperature setpoint is at least 5°F higher or lower than the current room temperature, depending on the season. If the circuit breaker has tripped, reset it once. If it trips again, stop there and call a professional to avoid damaging the system’s electronics.
For those comfortable with hands-on troubleshooting, a "jumper test" can help identify a faulty thermostat. First, turn off the power at the breaker. Then, remove the thermostat cover and twist the Red (power) and White (heat) wires together. Restore power and see if the furnace ignites. If it does, the thermostat likely needs replacing.
If these steps don’t fix the issue, it’s time to consider professional help.
If basic troubleshooting doesn’t resolve the problem or you encounter potential safety risks, it’s best to call an HVAC technician. Signs that require immediate attention include damaged or corroded wiring, burning smells, or visible sparks. These situations go beyond simple fixes and could pose serious hazards.
If your system still doesn’t respond after replacing batteries, resetting the breaker, and checking settings, it might indicate deeper electrical or communication issues that require specialized tools. For example, if a multimeter reading at the thermostat terminals shows significantly less than 24 volts, the problem likely lies in the power supply and is not something you can safely repair on your own.
Other signs of more complex issues include short-cycling (the system turning on and off repeatedly without achieving the set temperature) or nonstop operation even when set to "off." These symptoms may point to wiring shorts or calibration problems.
"Replacing a thermostat is a job best left to an HVAC technician due to the wiring and testing needed" – Anne Fonda, Trane Technologies
Professional installation typically costs between $100 and $300. Keep in mind that some manufacturers may void your HVAC warranty if the thermostat isn’t installed by a licensed professional.
Testing your thermostat regularly is a simple yet effective way to maintain comfort in your home and prevent minor issues from turning into expensive repairs. Regular checks not only keep your HVAC system running smoothly but can also help reduce energy bills. While most thermostats last about 10 years, routine testing ensures you catch potential problems before they lead to an emergency replacement.
"Regular thermostat testing not only helps maintain a comfortable living environment but also extends the lifespan of your HVAC equipment." – ToolsAdvisers
Make it a habit to test your thermostat twice a year – once before the heating season and again before the cooling season. Quick tasks like changing batteries and cleaning the device take just a few minutes but can prevent breakdowns during extreme weather.
By following this checklist, you can determine if you’re dealing with a minor thermostat issue or a more serious HVAC problem. Catching issues early can save you from costly repairs, often limiting expenses to a $100–$200 part replacement. However, if troubleshooting doesn’t solve the issue or you notice warning signs like burning smells or damaged wiring, it’s time to call a professional.
Keep this checklist handy for reference whenever your HVAC system acts up. Knowing how your thermostat operates throughout the year helps you spot issues early and maintain a consistent, comfortable indoor environment.
If you suspect your thermostat isn’t working properly, there are a few signs to watch for. These include uneven temperatures, no power to the unit, or an unresponsive system. To troubleshoot, try replacing the batteries, inspecting the wiring for any issues, or following a step-by-step guide specific to your thermostat model. If these checks point to a problem, it’s likely the thermostat itself causing the issue – not your HVAC system.
If there’s no 24 volts between R and C, it means your thermostat isn’t getting power. This might happen because of wiring problems, a blown fuse, or a malfunctioning transformer. Inspect these parts to pinpoint the issue.
A thermostat is typically expected to maintain accuracy within 1–2 degrees Fahrenheit. When it deviates beyond this range, it can lead to noticeable discomfort and may even drive up energy costs. Testing it regularly is a simple way to confirm that it’s working as it should.