Don’t Do This When Installing a Backsplash (Unless You Want to Redo It)

Don’t Do This When Installing a Backsplash (Unless You Want to Redo It)

A Backsplash Can Make or Break Your Kitchen or Bath

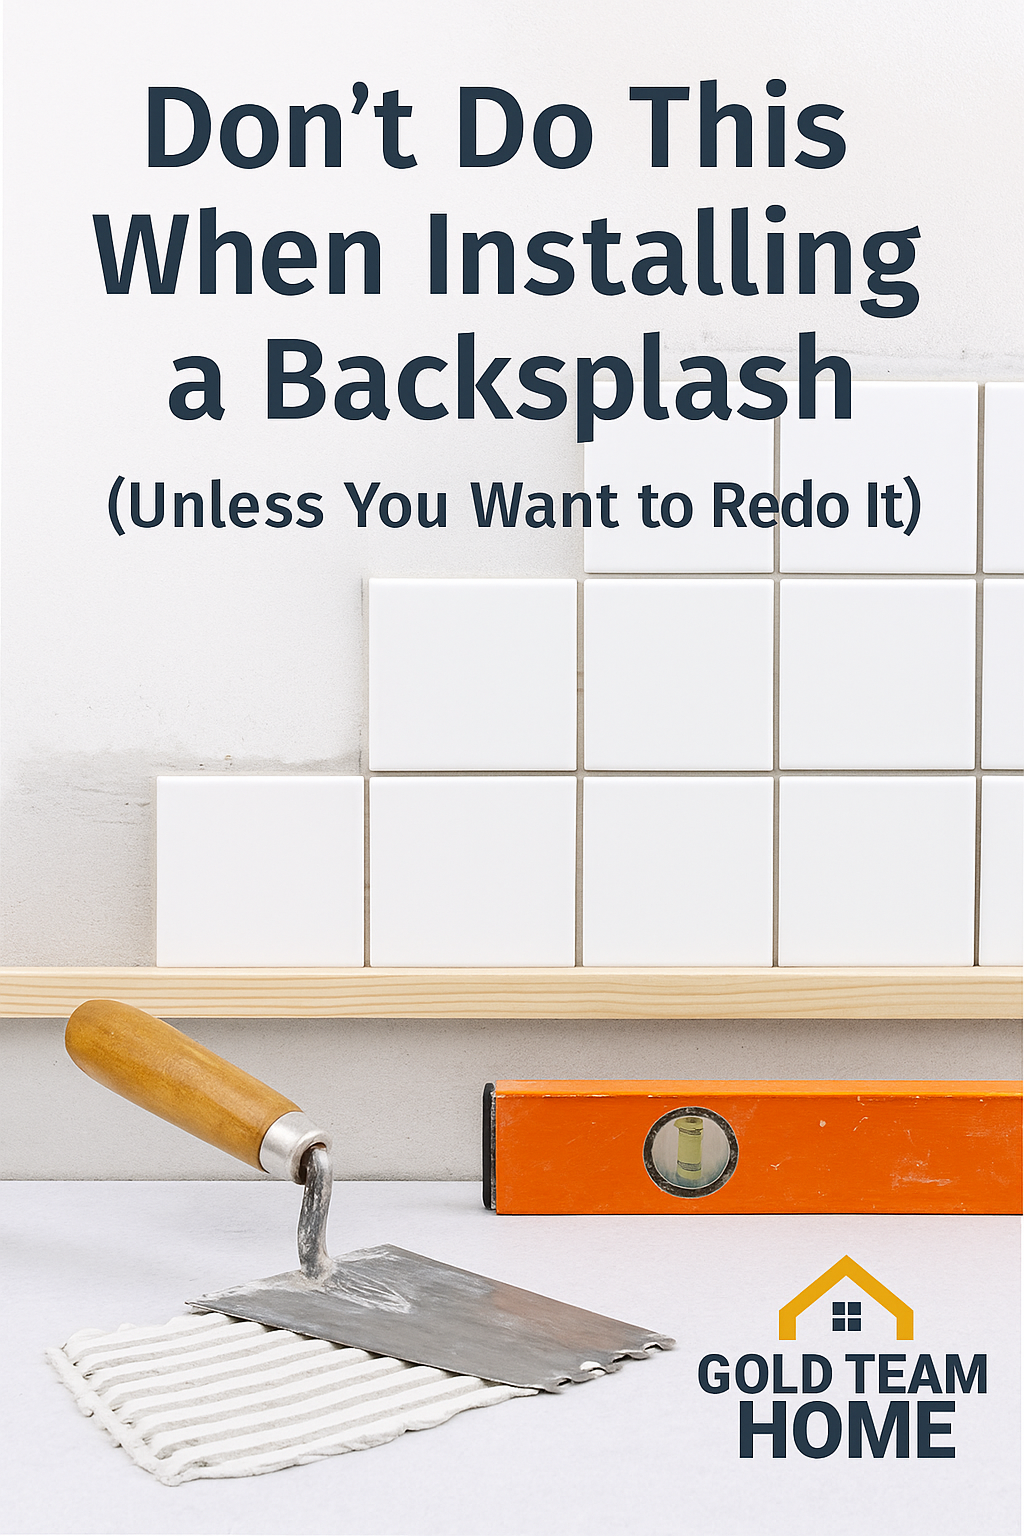
You’ve picked the perfect tile, lined up your tools, and you’re ready to upgrade your space. But here’s the catch, the difference between a professional-looking backsplash and a redo-worthy disaster usually comes down to a handful of common mistakes.

Whether it’s uneven spacing, skipping crucial prep, or forgetting to seal, these tile backsplash install mistakes can ruin the look and shorten the life of your project. The good news? Every single one is avoidable, if you know what to watch for.


Affiliate Disclosure: Some of the links below are affiliate links, which means we may earn a small commission if you choose to buy through them at no extra cost to you. This helps keep Gold Team Home running so we can keep sharing DIY tips and guides. Thanks for your support!


1. Skipping Surface Prep

The mistake: Installing tile over dirty, glossy, or uneven walls means poor adhesion and early failure. Paint overspray, old grease, and even tiny drywall imperfections can stop mortar from bonding properly.

Why it matters: The thinset or mastic acts like glue, but if the surface underneath is slick or contaminated, the tile will eventually loosen or fall.

The fix:

  • Pro fix: Scrub the wall with a degreaser like Krud Kutter Pre-Paint Cleaner, sand lightly to scuff glossy paint, and patch any dents or uneven spots with drywall compound.
  • Beginner workaround: At the very least, wipe the area down with warm soapy water, rinse, and let it dry. Check for bulges or dips with a straightedge and fill them before you start.

Pro tip: If your backsplash area is badly damaged or covered in old adhesive, consider replacing that section of drywall before tiling.


2. Forgetting a Ledger Board for the First Row

The mistake: Starting your first row directly on the countertop can make your lines follow every dip and bump in that surface. Even a slight slope can create a stair-step effect that gets worse as you move up.

Why it matters: Tile layout builds from the bottom up. If the base row is crooked, the whole backsplash will look off — and cutting the top tiles to hide it rarely works.

The fix:

  • Pro fix: Screw a perfectly straight ledger board (a piece of scrap wood or straight metal angle) to the wall at the height of your second row. This ensures your first visible row is dead level. Remove the board once the mortar sets, then cut and install the bottom row.
  • Beginner workaround: Use tile spacers under your first row and a long level to check every 2–3 tiles.

3. Uneven Spacing and Lippage

The mistake: “Lippage” is when one tile edge sits higher than the tile next to it. Combine that with inconsistent grout lines, and your backsplash instantly looks like a rushed DIY job.

Why it matters: It’s not just aesthetics — lippage can make grout harder to clean and can chip tile edges over time.

The fix:

  • Pro fix: Use tile spacers and a tile leveling clip system to keep everything flush and evenly spaced. Check your work frequently with a straightedge.
  • Beginner workaround: If you don’t want to invest in a clip system, go slowly and tap high tiles into place with a rubber mallet before the mortar dries.

4. Skipping the Expansion Gap

The mistake: Tiling tight against countertops, cabinets, or side walls leaves no room for natural expansion and contraction, which can cause cracked grout or popped tiles.

Why it matters: Changes in temperature and humidity make materials move — and tile needs space to absorb that movement.

The fix:

  • Pro fix: Leave a consistent 1/8-inch gap at all edges and fill it with color-matched silicone caulk instead of grout.
  • Beginner workaround: If you’ve already tiled tight, carefully cut a small channel along the edges with a grout saw and fill it with flexible caulk.

5. Using the Wrong Adhesive or Grout

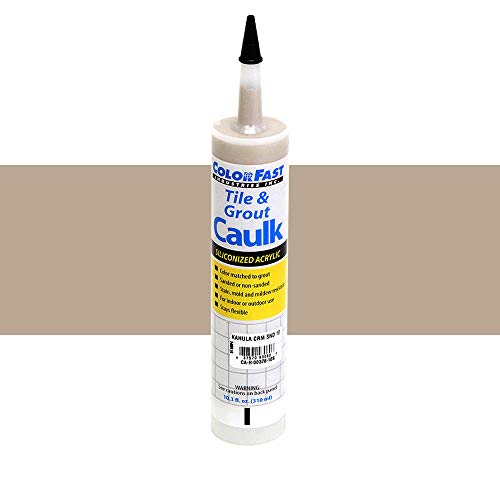
The mistake: Using premixed mastic behind a sink or stove, or the wrong grout type, can lead to moisture damage and staining.

Why it matters: Kitchen and bath backsplashes face constant exposure to water, steam, and grease, the wrong materials break down quickly in these conditions.

The fix:

  • Pro fix: Use a cement-based thinset mortar for wet or high-heat areas, and choose grout that’s appropriate for your tile size and location (sanded for wider joints, unsanded for narrow joints, epoxy for maximum stain resistance).
  • Beginner workaround: If premixed mastic is all you have, limit it to dry, low-heat sections of your backsplash.

6. Skipping Sealer on Natural Stone

The mistake: Installing marble, travertine, or other porous stone without sealing it first invites stains from grout and cooking splatters.

Why it matters: Once unsealed stone absorbs a stain, it’s almost impossible to remove, especially if the grout itself has set inside the pores.

The fix:

  • Pro fix: Apply a penetrating sealer before grouting, then reseal periodically to protect the surface.
  • Beginner workaround: If you’re nervous about sealing before grout, use a grout release product to help keep the tile clean during installation.

7. Rushing the Grouting and Curing Process

The mistake: Grouting too soon or disturbing tiles before the adhesive fully cures can weaken the bond and cause uneven lines.

Why it matters: Even if it looks solid, mortar needs time to harden. Disturbing it early can lead to tiles shifting out of alignment.

The fix:

  • Pro fix: Follow the adhesive manufacturer’s instructions. Usually at least 24 hours before grouting and another 48 before heavy cleaning.
  • Beginner workaround: Work in sections and set realistic daily goals so you’re not tempted to rush.

Backsplash Tool Kit

1/16" Spacer
We earn a commission if you make a purchase, at no additional cost to you.
10/07/2025 09:52 am GMT
We earn a commission if you make a purchase, at no additional cost to you.
10/07/2025 09:52 am GMT
We earn a commission if you make a purchase, at no additional cost to you.
10/07/2025 10:51 am GMT
We earn a commission if you make a purchase, at no additional cost to you.
10/07/2025 10:51 am GMT
We earn a commission if you make a purchase, at no additional cost to you.
10/07/2025 11:25 am GMT
We earn a commission if you make a purchase, at no additional cost to you.
10/07/2025 11:25 am GMT

Key Takeaways

  • Proper wall prep is non-negotiable for long-lasting adhesion.
  • Start with a straight ledger board so your lines stay level.
  • Use spacers and leveling systems to avoid uneven lines and lippage.
  • Leave an expansion gap at all edges to prevent cracking.
  • Choose adhesives and grout for your tile type and location.
  • Seal natural stone before grouting to prevent permanent stains.
  • Let mortar and grout cure fully before exposing to moisture or cleaning.

Get organized before you start. Use the DIY Project Planner to track every step.

Related posts: