New! DIY Project Planner. Plan smarter, skip the spreadsheets. Start Your Free Trial Today →

Smart DIY & Home Improvement Tips
Smart DIY & Home Improvement Tips
Step-by-step baseboard installation: prep, measuring, cutting, nailing, coping, caulking, and painting for a pro-looking finish.
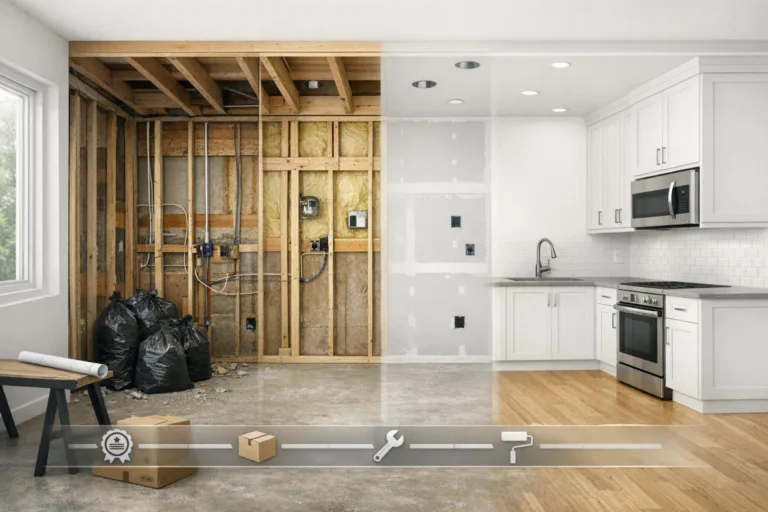
Installing baseboards is a practical DIY project that can improve the look of any room while saving you money. Here’s a quick breakdown of the process:
DIY costs range from $100–$500, compared to $1,100 for professional installation. With patience and attention to detail, you can achieve professional results.
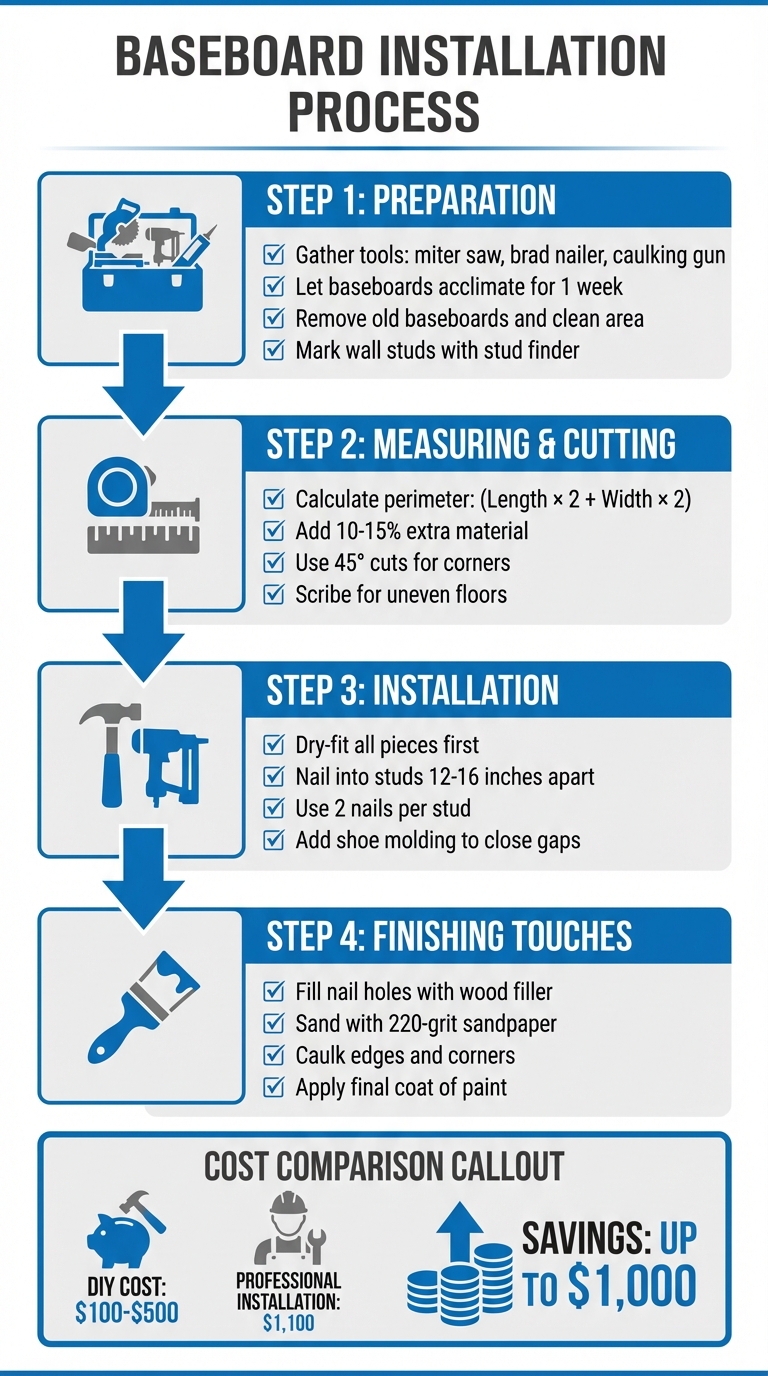
How to Install Baseboards: 4-Step DIY Process Guide
For precise cuts, a miter saw is your best bet, especially for those 45° angles. If you’re working on a smaller project, a miter box with a handsaw will do the trick. To attach the baseboards, a pneumatic or cordless brad nailer is a great time-saver and helps avoid unsightly hammer marks. For inside corners, a coping saw ensures a snug fit, and a compass is handy for scribing baseboards to match uneven floors.
Make sure you have these essentials on hand:
For supplies, stock up on baseboard molding, 1.5- to 2-inch finishing nails, wood glue or construction adhesive, paintable latex caulk, wood filler or spackle, and 120- to 220-grit sandpaper. Don’t forget safety gear like safety glasses, ear protection, and a kneeling pad for working close to the floor. To account for mistakes or corner cuts, buy 10% to 15% more material than the measured perimeter of your room.
Before installation, let your baseboards sit in the room for one week. This allows them to adjust to the room’s humidity, which prevents gaps later on.
"Acclimate your baseboards to their new environment a week before installation. In dry climates, baseboards shrink, while in wet climates they expand." – Mark Spelman, General Contractor
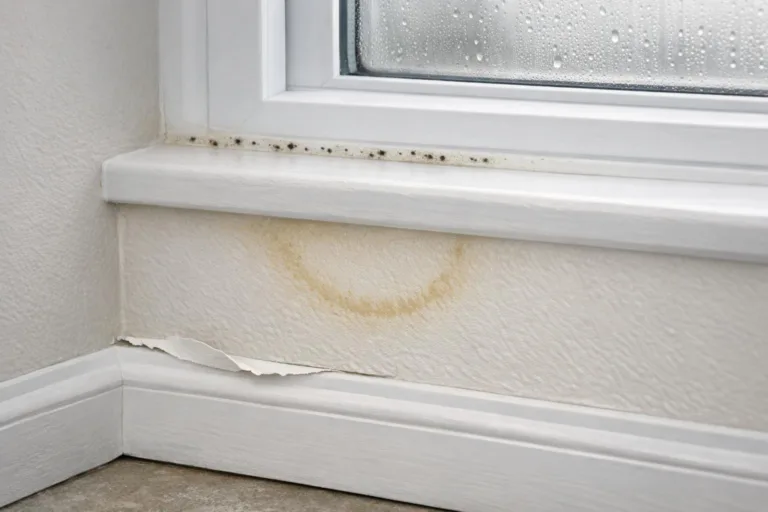
If you’re replacing old baseboards, start by scoring the caulk along the top edge with a utility knife. Then, gently pry them off, beginning at an outside corner. Use a putty knife to remove any remaining caulk, glue, or debris from the walls and floors – this ensures the new trim sits flush.
Next, locate the wall studs using a stud finder and mark their positions just above where the baseboard will go. Use a level to find the highest point of the floor and draw a reference line around the room. This line helps the baseboards appear straight, even if the floor isn’t perfectly level.
Finally, prime and paint the baseboards before installation. Doing this now means you’ll only need to touch up nail holes later, saving you from having to mask off floors and walls for painting.
With everything prepped, you’re ready to start measuring and marking the walls for a precise installation.
To figure out how much baseboard you’ll need, start by calculating the room’s perimeter: (Length × 2 + Width × 2). Then, subtract the width of any door openings and add an extra 10–15% to account for waste. For example, a 9′ × 11′ room would need around 58 linear feet of baseboard before adding the extra allowance for mistakes or cuts.
When working with corners, the approach differs slightly:
For both inside and outside corners, use the adjustable hook on your tape measure for accurate readings. If you’re dealing with long walls, plan to use scarf joints – these are 45° miter cuts that help create a smooth, nearly invisible transition between two pieces of trim.
"Measure twice, cut once is a good guideline. However, with trimwork, there’s no shame in intentionally cutting long and creeping up on the correct measurement with subsequent cuts."
– Deane Biermeier, Contributing Writer
Once you’ve completed your measurements, double-check the wall structure and floor alignment to ensure everything is ready for installation.
Before nailing anything, locate the studs in the walls. These are typically spaced 16 inches apart, so confirm their positions to ensure your baseboards are securely attached.
Next, check the floor’s level using a 4-foot level. Mark the highest point along the walls – this will serve as your reference point. Even if the floor slopes, this method ensures the baseboards appear straight. Floors with a slope of 3/4 inch or less from corner to corner can usually be managed without much trouble.
If the floor is significantly uneven, you’ll need to scribe the baseboards later. Scribing allows you to custom-fit the trim to the floor’s contours, ensuring a clean and professional look.
Not all corners are perfectly 90°, so it’s essential to measure the actual angle near the floor using a sliding bevel. Once you have the angle, divide it by two to set your miter saw correctly. For outside corners, cut at 45 degrees, ensuring the finished face of the baseboard forms the longer side of the angle. To get a snug fit, cut the board about 1/8 inch longer than your measurement so it can "spring" into place. Instead of relying solely on tape measurements, hold the trim against the wall and mark its back at the corner for accuracy.
For inside corners, you have two options: a miter joint or a coped joint. Miter joints involve cutting two 45-degree angles to meet, but they can leave gaps if the walls aren’t perfectly square. Holding the boards up to the corner before cutting helps you visualize how everything will align. On the other hand, coped joints are more forgiving and provide a tighter fit for inside corners.
Coping is the go-to method for achieving a tight, seamless fit on inside corners. Start by making a 45-degree miter cut on the end of the baseboard to expose its profile. Then, use a pencil to trace along the edge where the primer meets the exposed wood – this will serve as your cutting guide.
"A mitered corner might be ideal for an outside corner, but an inside corner joint will be better formed if you cope the profile of one baseboard to fit snugly against the contours of its mate." – Bob Vila
Using a coping saw, carefully cut along the traced profile line. Make a slight backcut to remove extra material from the rear, which helps the front edge fit tightly against the adjacent piece. If needed, refine the joint with a rasp, file, sandpaper, or even a knife until it fits perfectly.
When dealing with sloped or uneven floors, scribing is your best bet for ensuring the baseboards fit properly. First, find the floor’s highest point and use a scrap piece to mark a reference line. Align the top of all baseboards to this line so they appear straight, even if the floor isn’t level.
In older homes or with intricate moldings, you may need to scribe the bottom of the baseboards to match the floor’s contours precisely. A standard 3/8-inch baseboard works well for this because it’s more flexible and adapts better to uneven surfaces. If small gaps remain, cover them with shoe molding or quarter round for a polished look.
Start by placing each baseboard piece along the wall to check for a snug fit without gaps. This step helps you spot misaligned corners, uneven sections, or areas needing adjustment before attaching anything permanently. Mark the stud locations with a pencil just above where the baseboard will sit. If you notice gaps, you can use wood shims to fill them before nailing.
Once you’re satisfied with the fit, you’re ready to secure the baseboards.
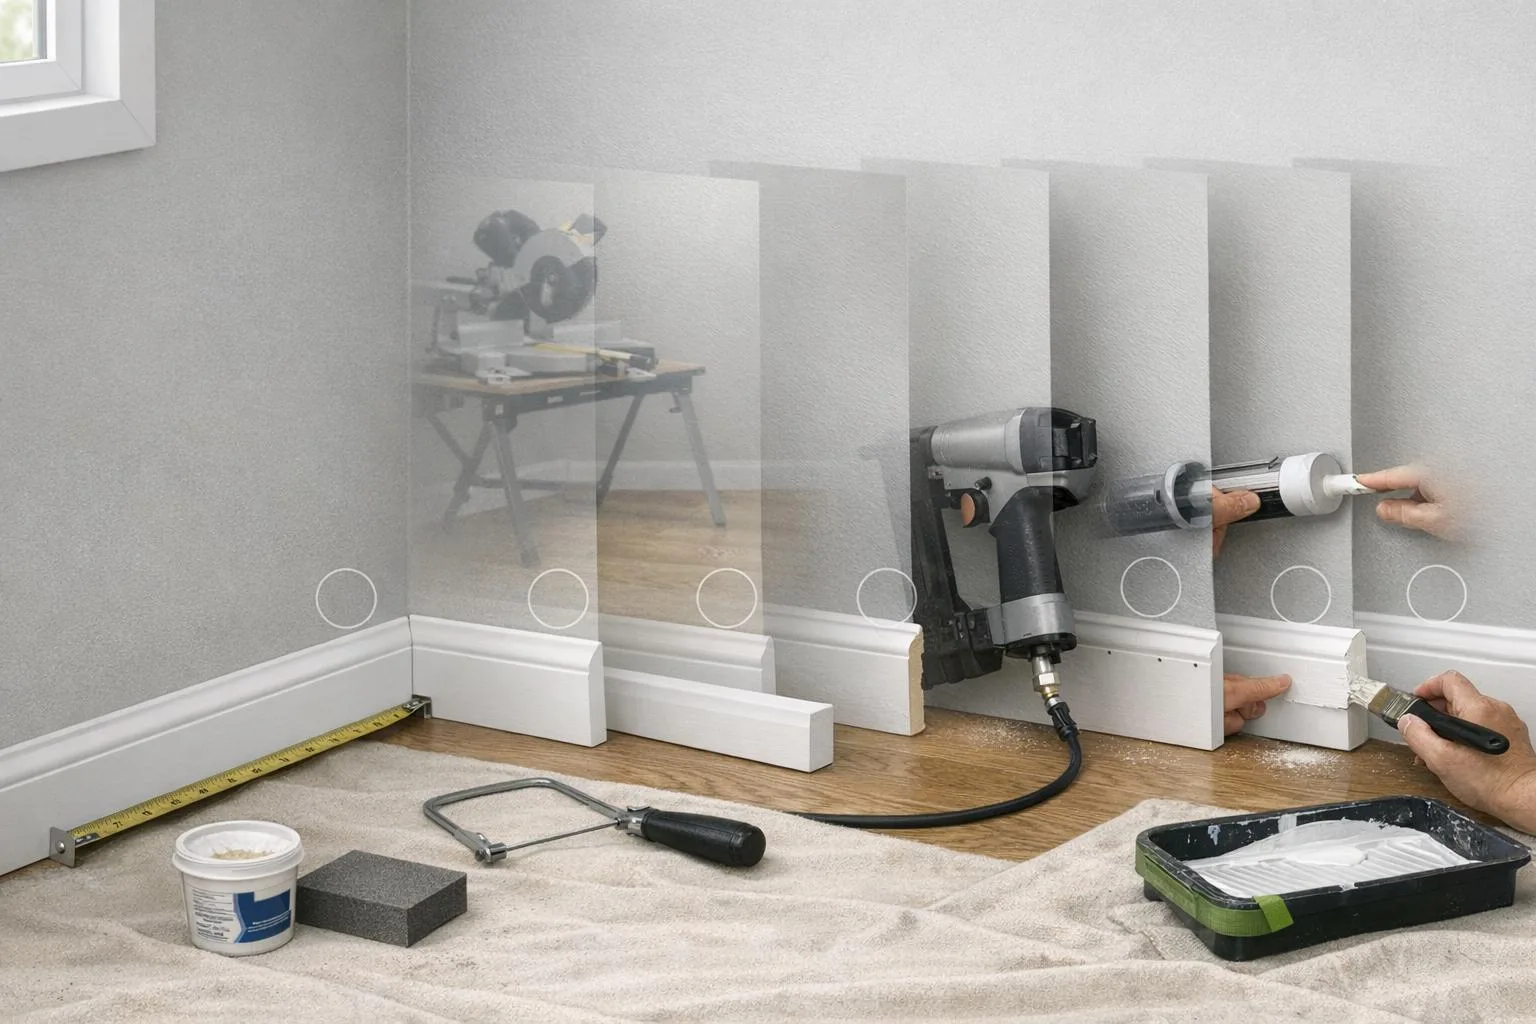
Attach the baseboards using two 1.5- to 2-inch finish nails angled downward into the marked studs. Space the nails about 12 to 16 inches apart. Using two nails per stud ensures a strong hold and helps prevent the baseboards from warping or pulling away over time. If there aren’t any studs in certain areas, you can nail into the bottom plate – the horizontal framing board at the base of the wall.
"Nailing them into studs adds to their stability. When studs aren’t available, you can secure them with drywall nails directly into the drywall and adhesive."
For added security, apply a thin bead of construction adhesive to the back of each board before nailing. This extra step is especially useful on uneven surfaces.
With the baseboards securely in place, you’re ready for the finishing details.
Once the baseboards are attached, install shoe molding or quarter round to close any gaps between the trim and the floor. This final step gives the room a polished look and hides minor imperfections that even precise scribing can’t fully eliminate.
Secure the molding to the baseboard – not the floor – to allow the flooring to expand and contract naturally with temperature and humidity changes. Use a brad nailer with 1-inch finish nails, angling them slightly upward into the baseboard to ensure a firm hold.
With the baseboards securely in place, it’s time to focus on the final details to give your project a polished, professional finish.
Start by cleaning around the nail holes to remove any dust or debris. Then, use a filler to patch the holes, slightly overfilling each one to account for shrinkage as it dries. For solid wood baseboards or larger holes, wood filler is your best option. On the other hand, spackling compound works well for small holes in paint-grade trim, as it dries quickly and is easy to sand.
Once the filler has dried completely (follow the manufacturer’s instructions), sand the area flush with 220-grit sandpaper. Be careful not to over-sand, as this can create unwanted indentations. After sanding, wipe the area clean with a damp rag to remove any remaining dust.
"Unfilled baseboard holes easily stand out, especially once the trim is painted or stained, drawing attention to imperfections that disrupt the appearance."
- Kate Fann, Contributing Writer
For a perfectly smooth finish, avoid using caulk to fill nail holes, as it cannot be sanded.
Once the holes are filled and sanded, you’re ready to move on to caulking and painting.
To achieve a seamless and polished look, apply caulk and finish with a fresh coat of paint. Use a thin bead of paintable latex caulk along the top edge of the baseboard where it meets the wall, as well as at inside corner joints. If there’s a gap between the baseboard and the floor, flexible, paintable latex caulk is ideal. For larger gaps, insert a foam backer rod before applying the caulk to ensure better support.
Smooth the caulk immediately after application using a caulk-finishing tool or a damp finger. Keep a damp paper towel nearby to moisten your finger, which helps prevent the caulk from sticking and ensures a cleaner, more even line. Once the caulk has dried completely, apply your final coat of paint to complete the project.
Installing baseboards yourself can transform the look of a room while keeping costs in check. With DIY, you’re looking at spending around $100 to $500, compared to the average $1,100 price tag for professional installation. The key to success lies in careful preparation and attention to detail.
By following the outlined steps, you can achieve a polished, professional finish. This includes accurate measuring (don’t forget to get 10% to 15% extra material), identifying wall studs, mastering techniques like coping inside corners, and finishing with wood filler, caulk, and paint. Each phase – from planning to the final touches – matters in creating a seamless result.
"Taking time for precise measurements and cuts will make a significant difference in achieving a polished, pro-installed look."
For more hands-on, step-by-step guides, check out Gold Team Home’s collection of home improvement tips.
Not only does your hard work enhance your living space, but it also adds value to your home.
When deciding between the two techniques, it all comes down to the condition of your walls. Mitering, which involves cutting baseboards at 45-degree angles, is ideal for corners that are perfectly square and even. However, if your walls are uneven or the corners aren’t exactly 90 degrees, coping is the better option. Coping allows for adjustments to fit irregularities, giving you a cleaner and more polished finish. Use miter cuts for precise corners and coping for tricky, uneven ones.
To work with baseboards on uneven floors, start by trimming the bottom edge to follow the floor’s height changes. Use angled miter cuts to adjust the fit, and smooth out any rough edges with sanding or planing. For a clean finish, consider adding base shoe molding to hide any visible gaps and give the project a polished appearance. Patience and attention to detail will help you achieve a seamless and professional result.
When tackling a painting project, it’s usually best to paint the walls before installing the baseboards. However, if the baseboards are already painted, you can install them first. Once installed, make sure to caulk any gaps, fill nail holes, and then touch up with trim paint for a polished look.
If the baseboards are unpainted, prioritize installation first. After they’re in place, caulk the seams and nail holes, then paint them to achieve a clean, professional finish.