DIY Trim and Molding: Choosing, Installing, and Finishing for a Pro Look


DIY Trim and Molding: Choosing, Installing, and Finishing for a Pro Look

The Power of Trim and Molding

Walk into a freshly painted room with no trim and it feels unfinished, almost like something is missing. Add crisp baseboards, crown molding, or even a simple chair rail, and suddenly the space looks intentional, polished, and complete.

Trim and molding are small details with big impact. They hide gaps, protect walls, and add architectural interest. Best of all, they’re one of the most DIY-friendly upgrades you can tackle with basic tools and some patience.

This guide is your complete roadmap to choosing, installing, and finishing trim and molding like a pro. We’ll cover styles, materials, tools, installation tips, finishing techniques, cost considerations, common mistakes, and even design inspiration to help you get it right the first time.


Affiliate Disclosure: Some of the links below are affiliate links. If you purchase through them, Gold Team Home may earn a commission at no extra cost to you. Thanks for supporting our site — it helps us keep producing free DIY guides.


A Quick Look at Trim Styles
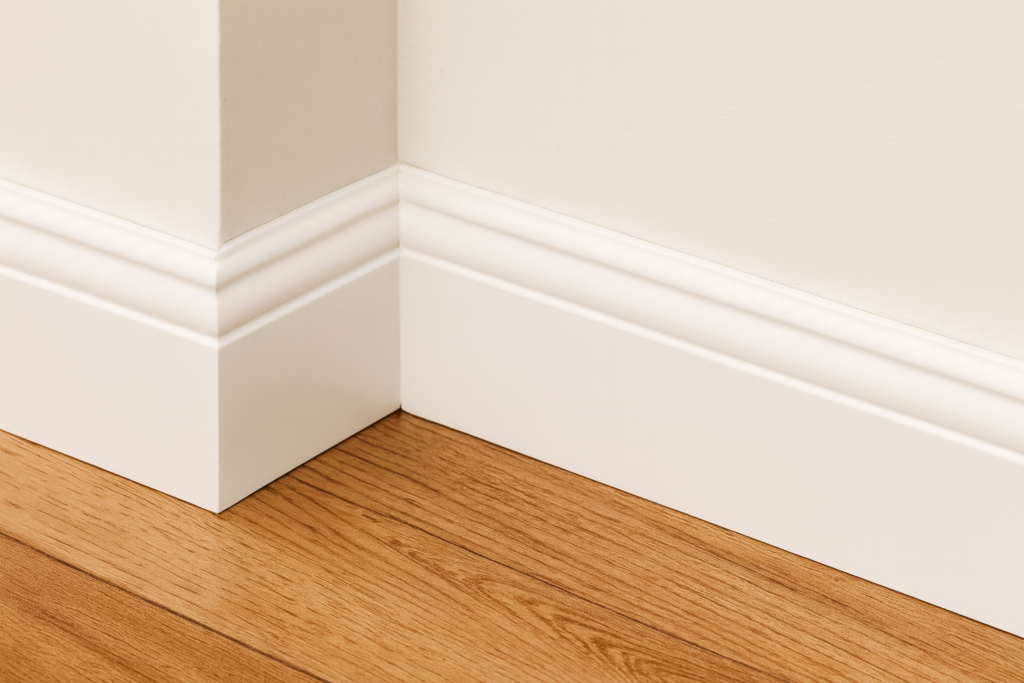
Baseboards

Close-up of a modern room corner where crisp white baseboards meet a beige wall and light wood flooring.
  • Installed where the wall meets the floor.
  • Cover expansion gaps in flooring and protect walls from kicks, vacuums, and furniture.
  • Heights range from 4-5 inches (standard builder-grade) to 7 inches (custom/luxury).
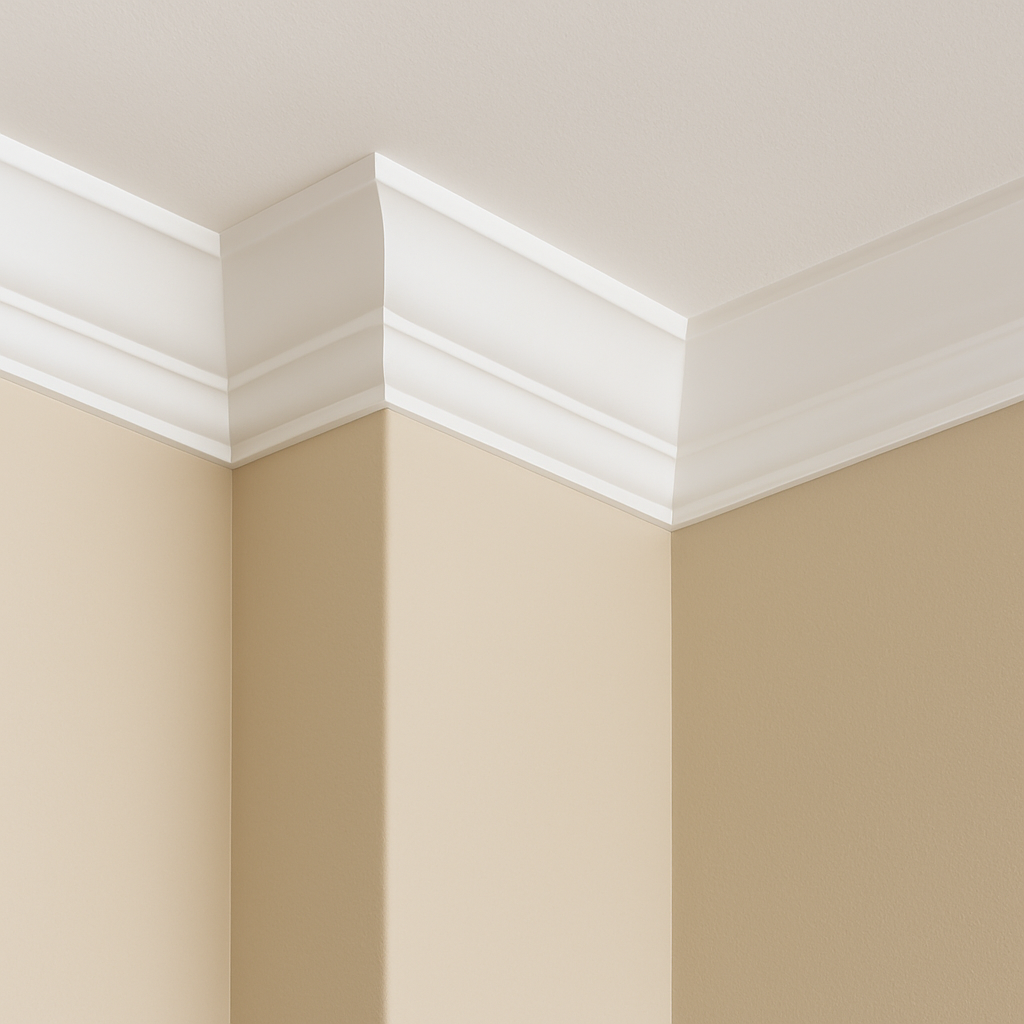
Crown Molding

Close-up of a beige wall corner where white crown molding meets the ceiling, with crisp edges and smooth painted finish.
  • Installed at the wall-to-ceiling transition.
  • Can be simple and sleek or highly decorative.
  • Adds height and elegance to a room, especially in living/dining spaces.

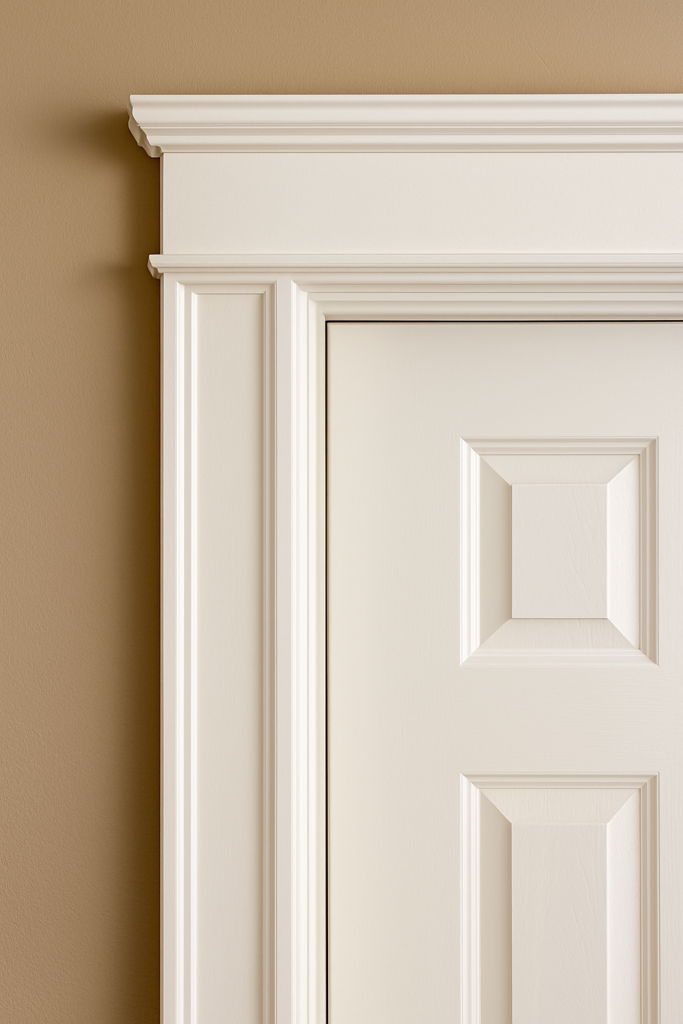
Door and Window Casings

Close-up of an interior doorway framed with white colonial-style casings against a beige wall.
  • Frame out windows and doors, covering gaps between drywall and frames.
  • Square or craftsman casing for modern homes; colonial profiles for traditional.

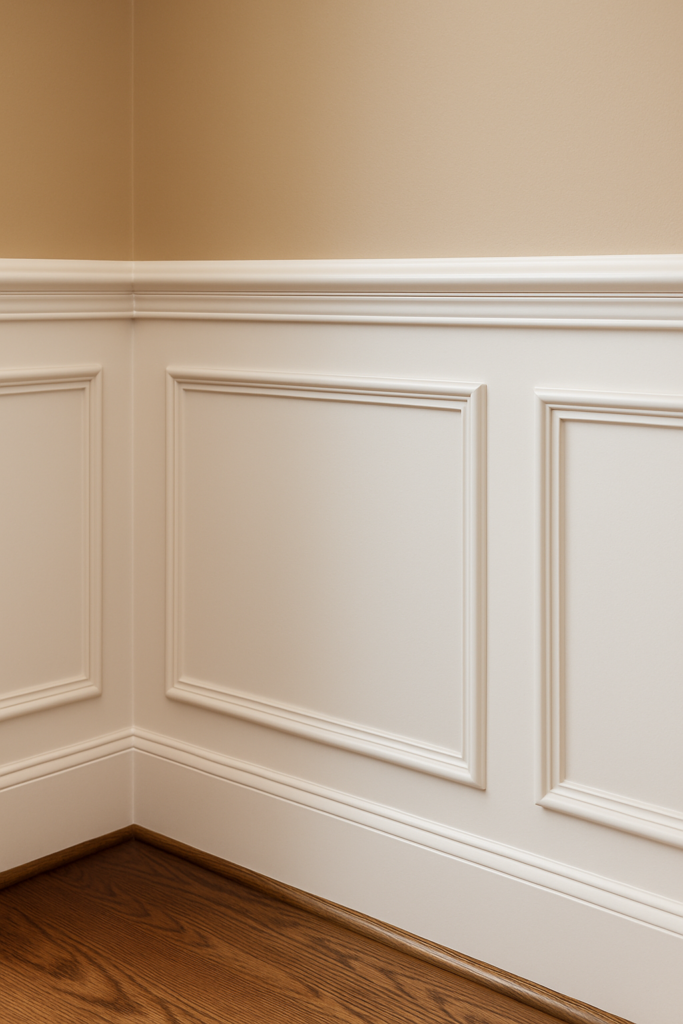
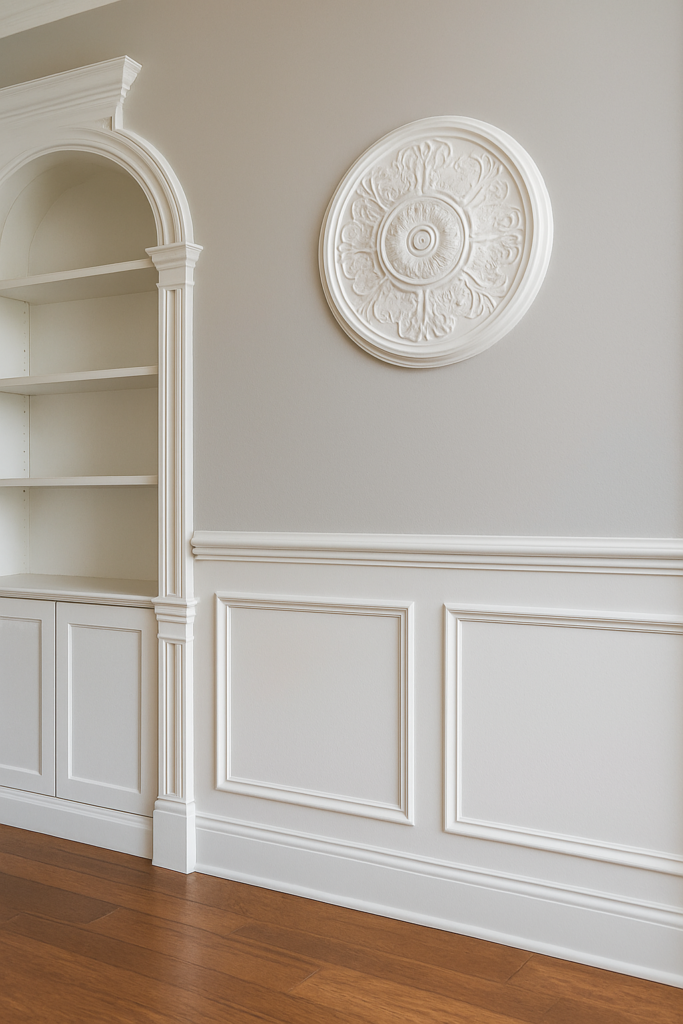
Chair Rails and Wainscoting

Dining room wall with crisp white chair rail molding and wainscoting panels below, contrasted with beige paint above and hardwood flooring at the base.
  • Chair rails protect walls from scuffs, especially in dining rooms.
  • Wainscoting panels add texture and break up tall walls.

Specialty Trim

Interior wall featuring specialty trim, including decorative picture frame molding, a circular wall medallion, and an arched built-in shelf with detailed casings, all painted white against a light gray wall.
  • Picture rails for hanging artwork.
  • Cove molding as a simpler alternative to crown.
  • Plinth blocks and rosettes for decorative corners.

Trim and Molding Materials: Pros and Cons

MaterialProsConsBest Use
MDF (Medium-Density Fiberboard)Inexpensive, smooth, easy to paint, pre-primedCan swell if wet, not stainablePainted baseboards, casings
Pine (Solid Wood)Affordable, can be painted or stained, widely availableMay warp if not acclimated, dents easierBaseboards, casings
Hardwoods (Oak, Maple, Poplar)Durable, beautiful grain, stainableExpensive, harder to cutStained trim, high-end installs
PVC/PolyurethaneWaterproof, flexible, lightweightLimited stain options, some profiles look syntheticBathrooms, basements, outdoor use

Recommended Products:


Tools You’ll Need for DIY Trim and Molding


Step-by-Step: Installing Trim Like a Pro

1. Plan and Measure

  • Measure each wall and opening.
  • Buy 10–15% extra material to cover errors and waste.
  • Let wood or MDF acclimate indoors for 48 hours to reduce warping.

2. Cutting

  • Outside corners: use 45° miter cuts.
  • Inside corners: cope one piece to fit tight against the other — less noticeable than two miters.
  • Long runs: scarf joint with overlapping 45° angles hides seams better than butt joints.

3. Dry Fit

Place trim against the wall before nailing. This catches mistakes early and avoids wasted pieces.

4. Fastening

  • Use a brad nailer with 2″ nails for most trim.
  • Nail into studs whenever possible for solid hold.
  • For crown molding, nail into both wall studs and ceiling joists.

5. Fill and Caulk

  • Fill nail holes with wood filler.
  • Sand smooth once dry.
  • Caulk all edges where trim meets walls or ceilings for a seamless finish.

6. Prime and Paint/Stain

  • Pre-primed MDF only needs paint.
  • For raw wood, apply primer to prevent grain bleed.
  • Use semi-gloss or gloss paint for trim — durable and easy to clean.
  • For stained wood, finish with polyurethane for protection.

Want to organize your trim project measurements, cuts, and supply list? Use the Gold Team Home DIY Project Planner to simplify your workflow.


Finishing Options: Paint vs. Stain

  • Painted Trim
    • Classic and modern depending on profile.
    • White semi-gloss is the most popular finish.
    • Hides imperfections in MDF or pine.
  • Stained Trim
    • Highlights wood grain for a warm, natural look.
    • Works best with hardwoods like oak, maple, or poplar.
    • Adds richness in traditional or rustic designs.
  • Two-Tone Contrast
    • Dark trim with light walls (or vice versa) creates visual drama.

Cost Breakdown

  • Baseboards: $0.80–$3.00 per linear foot (MDF vs wood).
  • Crown Molding: $1.50–$6.00 per linear foot.
  • Casings: $1.00–$4.00 per linear foot.
  • Tools:
    • Brad nailer kit: ~$400
    • Miter saw: ~$200 (or rent for $30/day)

A single 12×12 room can often be trimmed out for under $300 in materials if you already own tools.


Common Mistakes and How to Avoid Them

  • Crooked Lines: Always use a level for chair rails and wainscoting.
  • Open Gaps at Corners: Cope inside corners instead of mitering both pieces.
  • Skipping Caulk: Even small gaps show up after paint.
  • Cutting Too Short: Err on the side of long, then trim down.
  • Wrong Paint Sheen: Flat or eggshell paint scuffs easily on trim — always use semi-gloss or gloss.

Design Inspiration: Trim That Transforms Rooms

  • Tall Baseboards in Modern Homes: Upgrade from 2.5” to 5”+ baseboards for instant impact.
  • Crown Molding in Dining Rooms: Adds formality and elegance.
  • Craftsman-Style Casings: Square, simple profiles frame doors and windows beautifully in modern homes.
  • Wainscoting in Entryways: Protects walls and creates a statement look.
  • Accent Walls with Picture Frame Molding: Adds texture and architectural detail without major cost.

Troubleshooting Trim Problems

  • Uneven Walls/Floors: Scribe trim (trace unevenness and cut to match).
  • Big Gaps After Install: Use backer rod or multiple caulk passes.
  • Warped Boards: Clamp and glue bowed sections before fastening.
  • Nail Blowouts: If nails split wood, switch to a thinner gauge brad.

Key Takeaways

  • Trim and molding are small upgrades with major impact on your home’s look.
  • Choose materials that fit your budget and finish preference — MDF for paint, hardwoods for stain, PVC for moisture areas.
  • Invest in the right tools (miter saw, brad nailer, caulk gun) for cleaner results and fewer frustrations.
  • Take time to fill, sand, and caulk before finishing — that’s what makes trim look professional.
  • Use the DIY Project Planner to map your cuts, materials, and tools before starting.

Related Posts: