New! DIY Project Planner. Plan smarter, skip the spreadsheets. Start Your Free Trial Today →

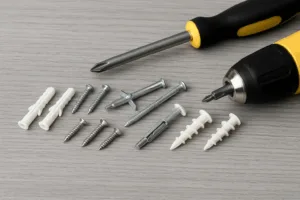
Choosing the wrong wall anchor can wreck your drywall or send your shelf crashing down. This guide shows exactly what size wall anchors to use — and which screws work with them — even if you’ve never touched a drill before.
Tools
Materials
Just a heads up: Some of the links in this guide are affiliate links, which means we may earn a small commission if you buy through them (at no extra cost to you). We only recommend tools we trust — thanks for supporting Gold Team Home!
Before you choose an anchor size, you need to know what you’re anchoring into.
Use a stud finder to scan your wall and mark whether you’re hitting hollow drywall or a solid stud.
Choose your wall anchor based on what you’re hanging and how much it weighs.
| Item Type | Recommended Anchor | Weight Capacity |
|---|---|---|
| Small decor (<10 lbs) | Plastic expansion anchor + #6–#8 screw | Up to 15 lbs |
| Medium decor (10–25 lbs) | Self-drilling drywall anchor | 25–50 lbs |
| Shelves, mirrors (25+ lbs) | Toggle bolt or molly bolt | 50–100+ lbs (toggle) |
| Into stud (any weight) | Wood screw only — no anchor needed | 100+ lbs |
Beginner Tip: If in doubt, go stronger than needed — overkill is better than wall damage.
Anchor packaging often lists the compatible screw size and wall thickness it works with. But here’s a cheat sheet:
| Anchor Size | Compatible Screw | Wall Type |
|---|---|---|
| Small (3/16″) | #6–#8 screw | Drywall or plaster |
| Medium (1/4″) | #8–#10 screw | Drywall, studs |
| Large (3/8″+) | #10–#12 screw or toggle | Drywall, concrete |
Wall anchor kits usually include the right screw — but double check before installing.
Some anchors (like plastic or toggle) require a pilot hole. Others (like self-drilling anchors) do not.
Tip: Pilot holes should be just slightly smaller than the anchor for a tight grip.
Follow the instructions for your anchor type:
Don’t overtighten — anchors can spin or strip if forced.
Place your item’s bracket or mounting hardware, then insert the screw through it into the anchor.
✅ You’ve now chosen the right wall anchor, matched it to the proper screw, and installed it safely — without the guesswork.
Browse our full library of beginner-friendly guides — from quick upgrades to full weekend projects, all designed to help you build confidence and make your home your own.
✅ Pro Tips
✅ Use a screw sizing gauge
Some anchor kits include a sizing card — use it to match your screw perfectly to the anchor and avoid guesswork.✅ Mark your drill bit with painter’s tape
Wrap tape around the bit to match the anchor depth — this prevents drilling too deep or punching through the wall.✅ Start with a test anchor
If you’ve never used anchors before, try one on a scrap board or behind a picture frame to get the feel.✅ Always double-check weight ratings
Every anchor has a max load — exceeding it can cause long-term failure even if it holds at first.
❌ Common Mistakes to Avoid
❌ Using drywall anchors in studs
If you hit a stud, don’t use an anchor — just drive a screw directly into the wood. Anchors won’t hold in solid material.❌ Oversizing the pilot hole
A hole that’s too big makes your anchor spin or fall out. Always match the drill bit to the anchor body, not the screw.❌ Overtightening the screw
Too much torque can strip the anchor or crush drywall behind it — tighten until firm, then stop.❌ Skipping the level or measuring tape
Even if the anchor holds well, your item will look sloppy if it’s crooked or misaligned. Take your time.
Upgrading your gear makes every project easier (and way more fun). We’ve rounded up the best drills, levels, saws, and more — all tested for real-world DIY use.
Join our free DIY email list and get weekly tips, tools, and guides to tackle your next home project like a pro. No spam, just real help.