New! DIY Project Planner. Plan smarter, skip the spreadsheets. Start Your Free Trial Today →

Smart DIY & Home Improvement Tips
Smart DIY & Home Improvement Tips
Drywall Nail pops and settling cracks are a normal part of home ownership, but that doesn’t mean you have to live with them. This simple guide shows you How to Fix Drywall Nail Pops and Drywall Cracks so they blend in perfectly and stay fixed.
Tools
Materials
Just a heads up: Some of the links below are affiliate links, which means we may earn a small commission if you buy through them (at no extra cost to you). We only recommend gear we trust — thanks for your support!
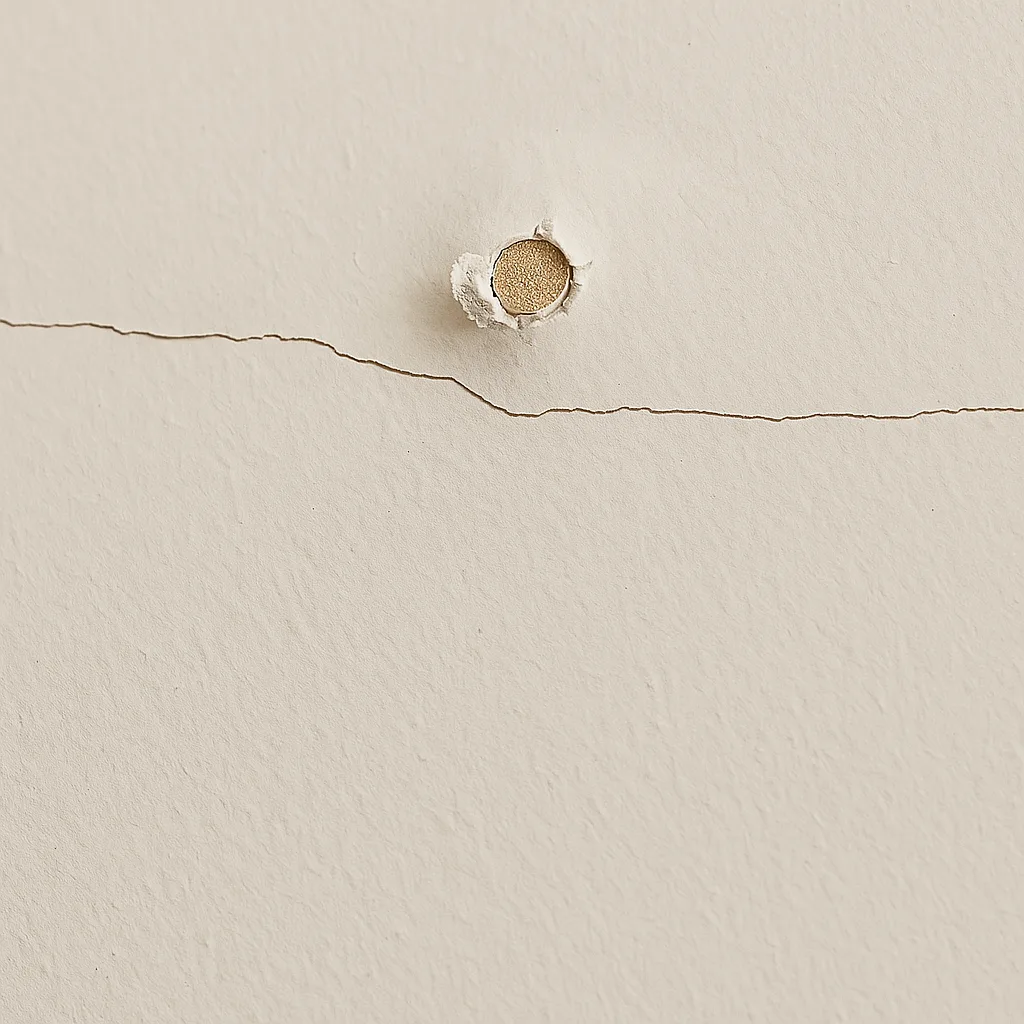
Look for:
Touch around the spot.
If the wall feels soft or mushy, it may need more than a patch. If it’s firm with just a visible flaw, you’re good to go.
Use a putty knife or utility knife to gently scrape away:
For drywall nail pops:
If there’s a screw sticking out, either:
Tip: Don’t stress about getting it perfect. The next step smooths it all out.
Use a small putty knife and spread a thin layer of joint compound over the spot.
Let it dry for 1–2 hours (check your compound label).
It won’t look perfect yet — that’s normal.
Use a sanding sponge or sanding block (medium grit) to smooth the surface.
💡 Pro Tip: Hold a flashlight sideways to spot uneven areas. It’ll highlight any ridges before painting.
If it looks uneven or sunken:
Most spots need two coats — that’s totally normal.
Before painting:
⚠️ Don’t skip the primer:
If you paint directly over the patch, it might show through as a dull or shiny spot — that’s called flashing.
Wipe the wall with a slightly damp cloth to remove dust before painting
Rinse your putty knife and sanding block with water right after using
Fixing drywall damage is one of the easiest ways to refresh a room.
Looking for more fast, frustration-free fixes?
✅ Pro Tips:
- Use setting-type joint compound (like 20-minute mud) for deeper cracks or problem areas — it dries harder and shrinks less.
- Slightly recess the screw head when fixing drywall nail pops, but don’t break the paper — you want the compound to grip, not crack.
- Feather your edges wide when applying compound so the repair blends seamlessly into the surrounding wall.
- Lightly mist with water before sanding to cut down on dust — or use a sanding sponge with a dust catcher.
- Prime patched areas before painting — bare compound can cause uneven color and texture if skipped.
❌ Mistakes to Avoid:
Using spackle on large cracks or drywall nail pops — spackle isn’t strong enough for deep repairs; use joint compound instead.
Skipping fasteners on both sides of the drywall nail pop — always install at least one screw above and below the pop to lock it in.
Applying compound too thick in one go — it leads to shrinkage cracks or longer dry times.
Sanding too early — make sure the patch is completely dry or you’ll rip the surface and create more work.
Neglecting hairline cracks — they may seem small but can spread or reopen if not properly patched.
Patch drywall cracks and drywall nail pops cleanly and confidently with the right gear:
Don’t guess. Grab the go-to tools we recommend for any home project. Reliable, beginner-safe, and worth every penny.
Join our free DIY email list and get weekly tips, tools, and guides to tackle your next home project like a pro. No spam, just real help.