New! DIY Project Planner. Plan smarter, skip the spreadsheets. Start Your Free Trial Today →

Smart DIY & Home Improvement Tips
Smart DIY & Home Improvement Tips
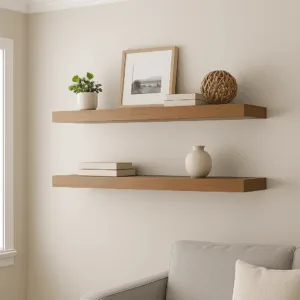
Installing floating shelves seems simple — until they sag, tilt, or rip out of the wall. This guide walks you through every step so your shelves stay secure and level for good.
Tools
Materials
Just a heads up: Some of the links below are affiliate links, which means we may earn a small commission if you buy through them (at no extra cost to you). We only recommend gear we trust — thanks for your support!
Before drilling anything, decide exactly where the shelf should go.
Tool Tip: Use a measuring tape and pencil to mark both ends of where the shelf will sit.
Use a stud finder to check if there’s a wall stud where the brackets will mount.
Get a stud finder
Beginner Tip: Don’t guess — guessing leads to slanted or unstable shelves.
Hold your shelf bracket against the wall and mark where the mounting holes will go.
Bracket Style Note: Most kits include concealed rod brackets or L-brackets. Follow the included instructions for spacing — but always mark with your own measurements before drilling.
Drill small pilot holes at each mark to make driving screws easier and more precise.
Cordless drill options
⚠️ Safety Note: Wear safety glasses when drilling — especially in older walls or plaster.
If you’re not hitting a stud, insert wall anchors into the pilot holes.
Wall Surface Tip:
If you’re installing shelves into tile, brick, or plaster, use masonry anchors and a masonry drill bit. Drilling into hard surfaces requires slower speed and a firm hand.
Screw the brackets into the wall using your drill or a screwdriver.
For hidden brackets, slide the shelf onto the rods until it’s flush with the wall.
Use your level one last time to ensure the shelf is straight.
✅ Done! You now have a strong, level floating shelf that’s built to last.
Want more projects that make your home look amazing without hiring it out? Check out more beginner-friendly guides that help you upgrade, fix, and organize your home the right way.
✅ Pro Tips
✅ Use a long level when mounting multiple shelves
This keeps spacing and alignment perfect across a wall. A 24–48″ level or laser level works great.✅ Always test shelf placement with painter’s tape first
Taping out the shape helps you visualize proportions and avoid last-minute regrets.✅ Load test with lightweight items first
This lets you verify stability before trusting your shelf with fragile or heavy decor.✅ Keep a small bin of extra wall anchors and screws
If one fails or strips, you won’t have to stop mid-project and run to the store.
❌ Common Mistakes to Avoid
❌ Skipping the stud finder
Guessing where studs are leads to poor support and crooked shelves. Use the tool.❌ Using weak anchors or incorrect drill bits
Cheap wall plugs and the wrong bit size are the #1 cause of sagging or pulled-out shelves.❌ Mounting brackets before checking for level
If you screw it in before leveling, there’s no easy fix. Always level before drilling.❌ Ignoring your wall type
Drywall, plaster, tile, or masonry each need different anchors. Don’t treat them the same.
Don’t guess. Grab the go-to tools we recommend for any home project. Reliable, beginner-safe, and worth every penny.
Join our free DIY email list and get weekly tips, tools, and guides to tackle your next home project like a pro. No spam, just real help.